Workflows
Workflows allow you to quickly populate a new project with a predefined sequence of jobs. By chaining individual job nodes, you can process a cryo-EM dataset from pre-processing through to 3D reconstruction in a consistent and reproducible way.
Why use workflows?
Workflows are particularly useful for:
• Repeated projects where the optimal processing path is already known (e.g. the same target with different ligands)
• Running a standardised pipeline to quickly assess dataset or sample quality
• Saving time, ensuring consistency, and reducing the risk of user error
To use workflows, you must first create a new workflow or modify an existing one. Once a workflow is available, a new project can be started by selecting both a dataset and a workflow.
The Workflows page
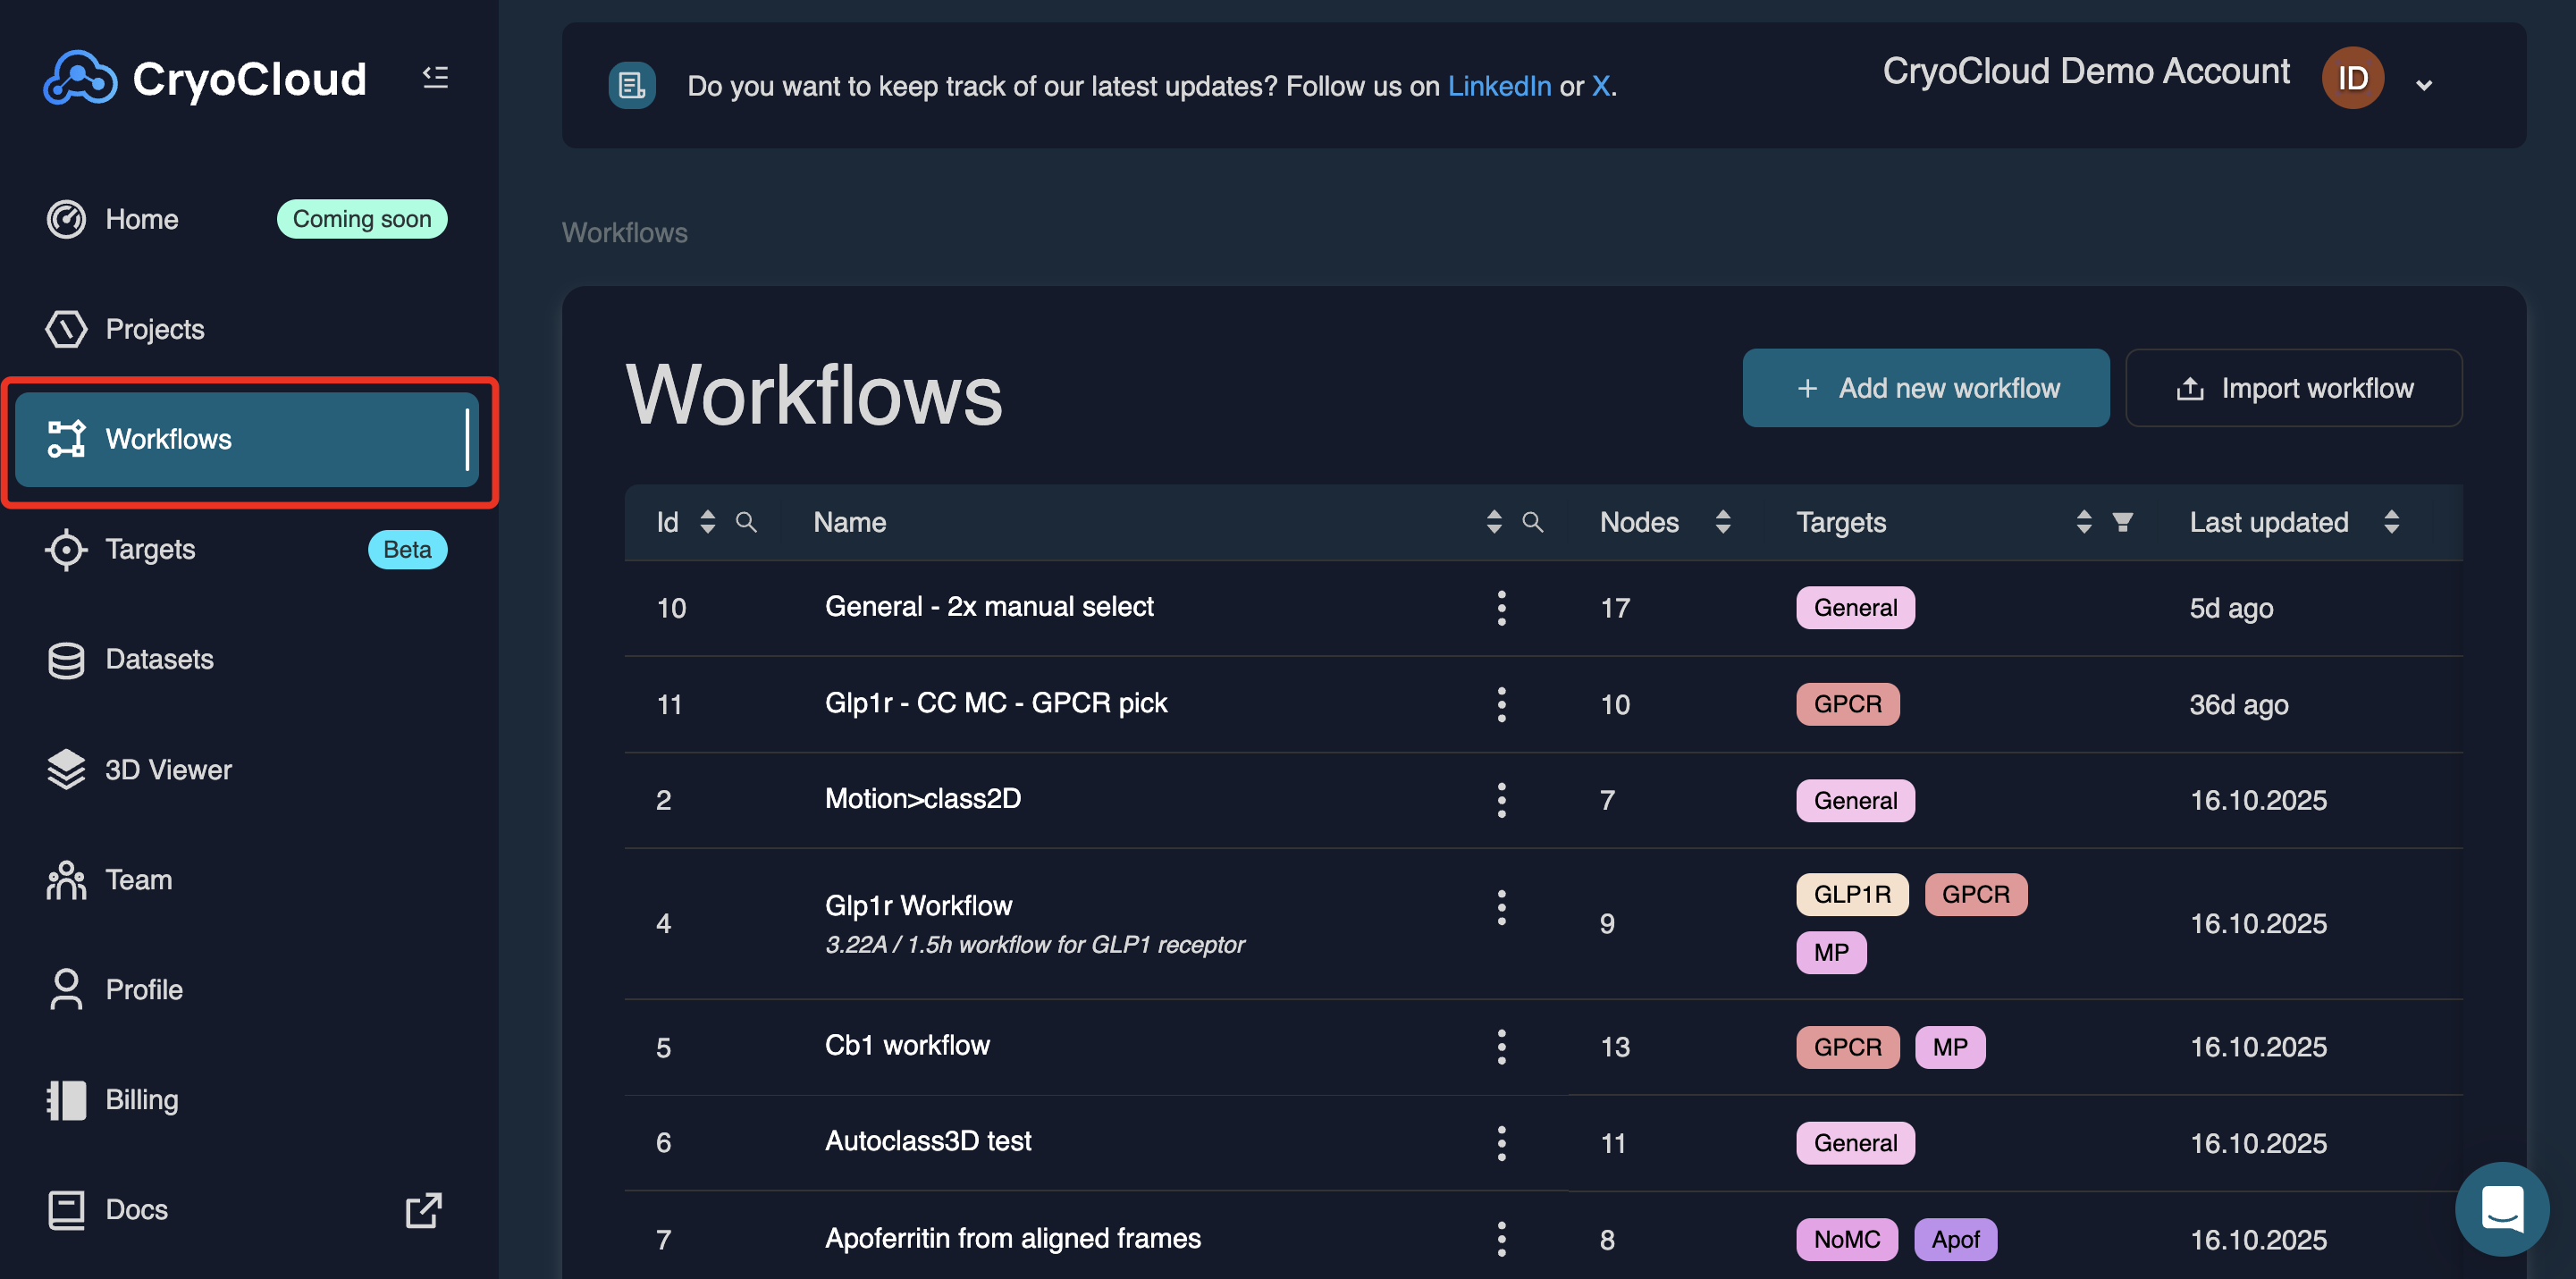
The Workflows page can be accessed via the Workflows tab in the left-hand navigation panel. This page provides an overview of all workflows available to your team.
You can filter or sort workflows by: ID, Name, Target Workflow type and Creator. Use the search field or column filters to quickly locate specific workflows.
You can open an existing workflow by clicking its name. Clicking the three-dot menu next to the workflow name opens additional actions, allowing you to export, clone, or delete the workflow.
Creating a new workflow
Click
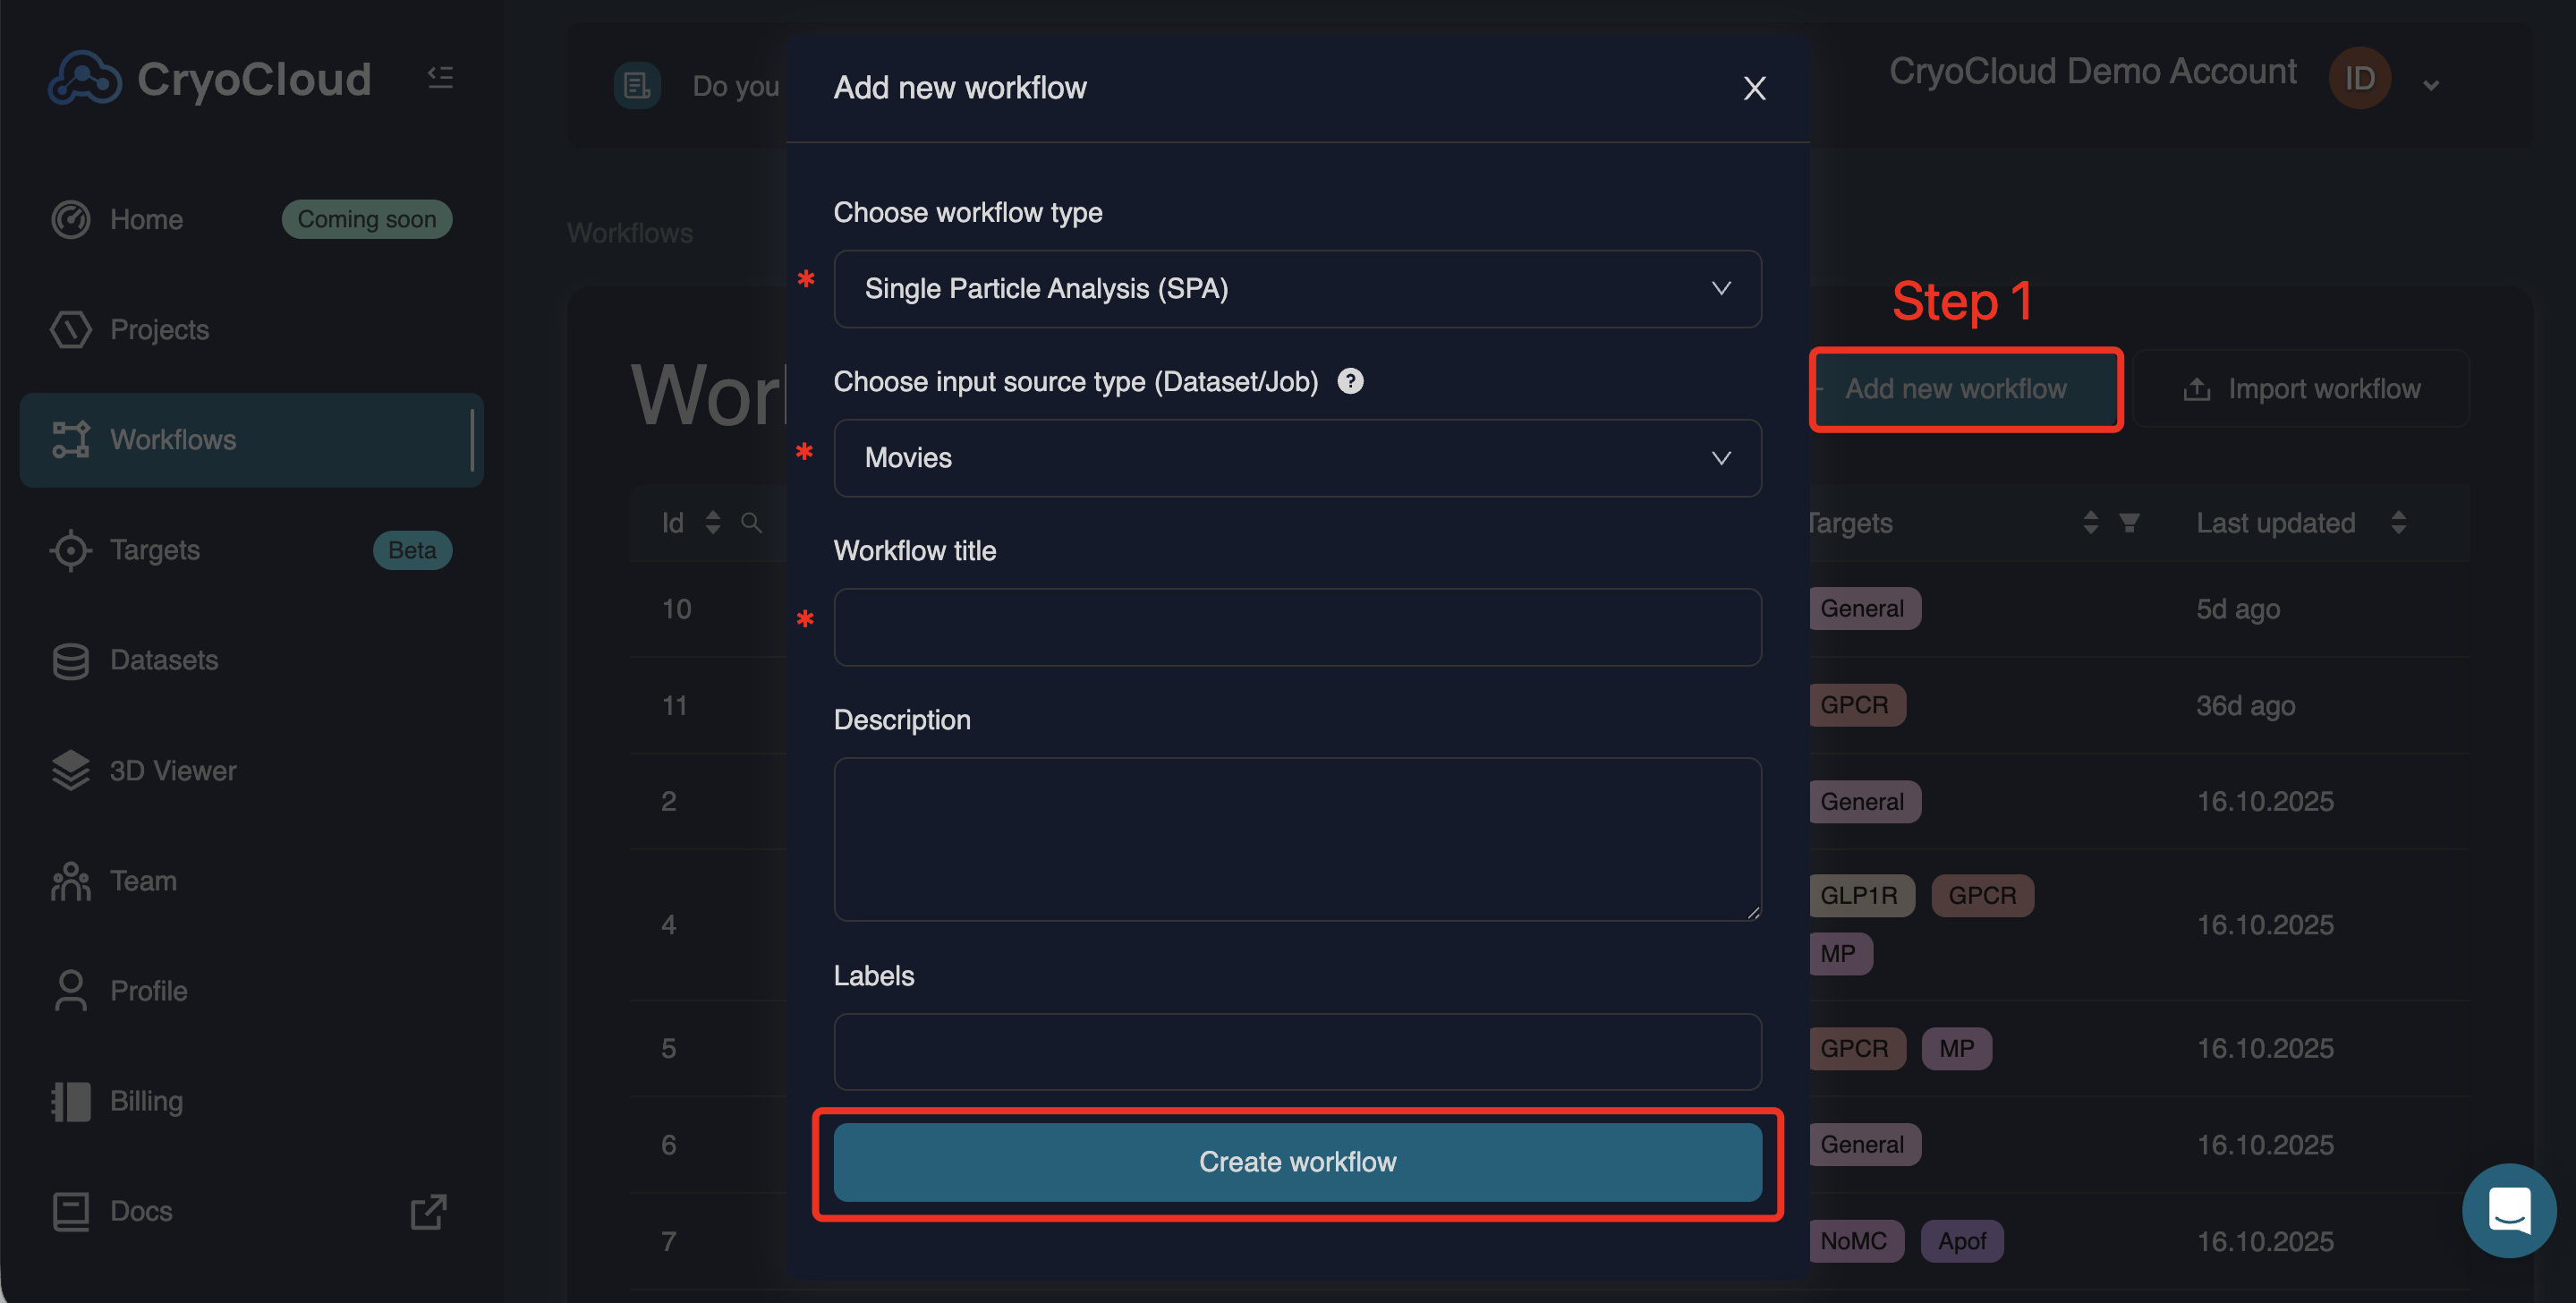
At a minimum, you need to specify:
• Workflow type (SPA, Cryo-ET, or X-ray)
• Input source type (e.g. movies, aligned frames, particles)
• Workflow title (optional, but strongly recommended)
You can also add a description and labels. Click to continue.
Adding workflow nodes
When a workflow is first created, it contains no job nodes:
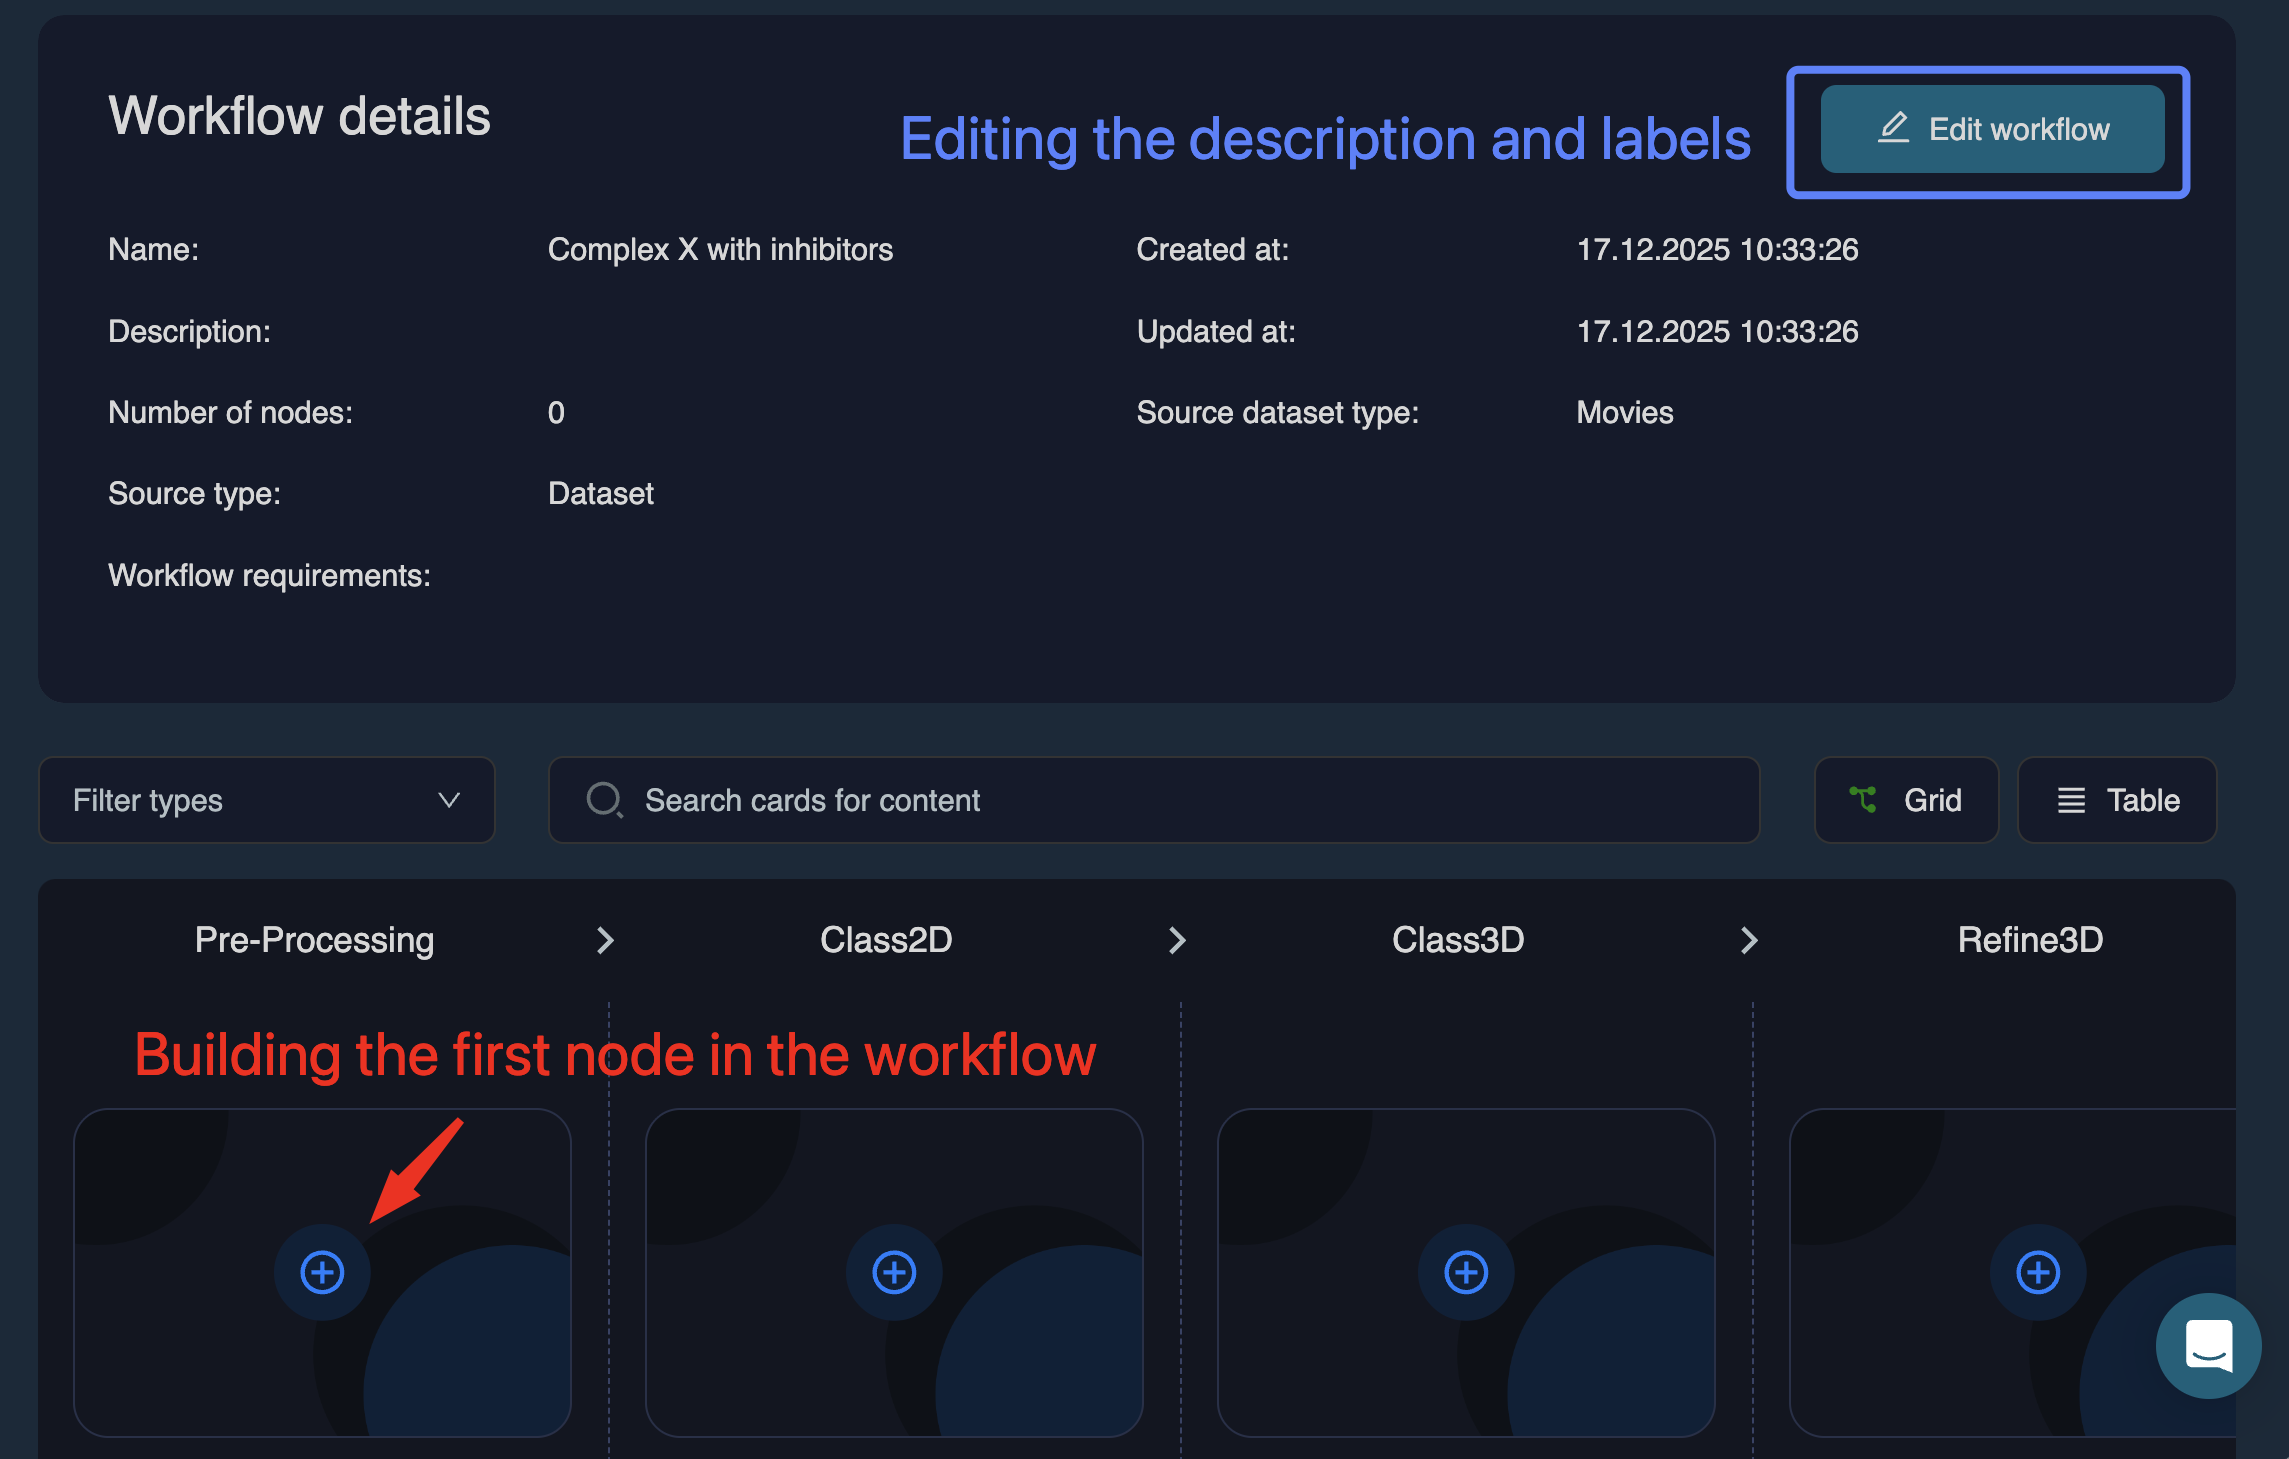
From here, you can:
• Click (top right) to modify the name, description, or labels
• Begin adding job nodes to build the workflow.
Click the icon in any column to add the first workflow node:
For raw movies or aligned frames, this will usually be in the Pre-processing column. For particle stacks, you will start in later columns (e.g. 2D classification, 3D classification, or refinement), depending on your intended starting point.
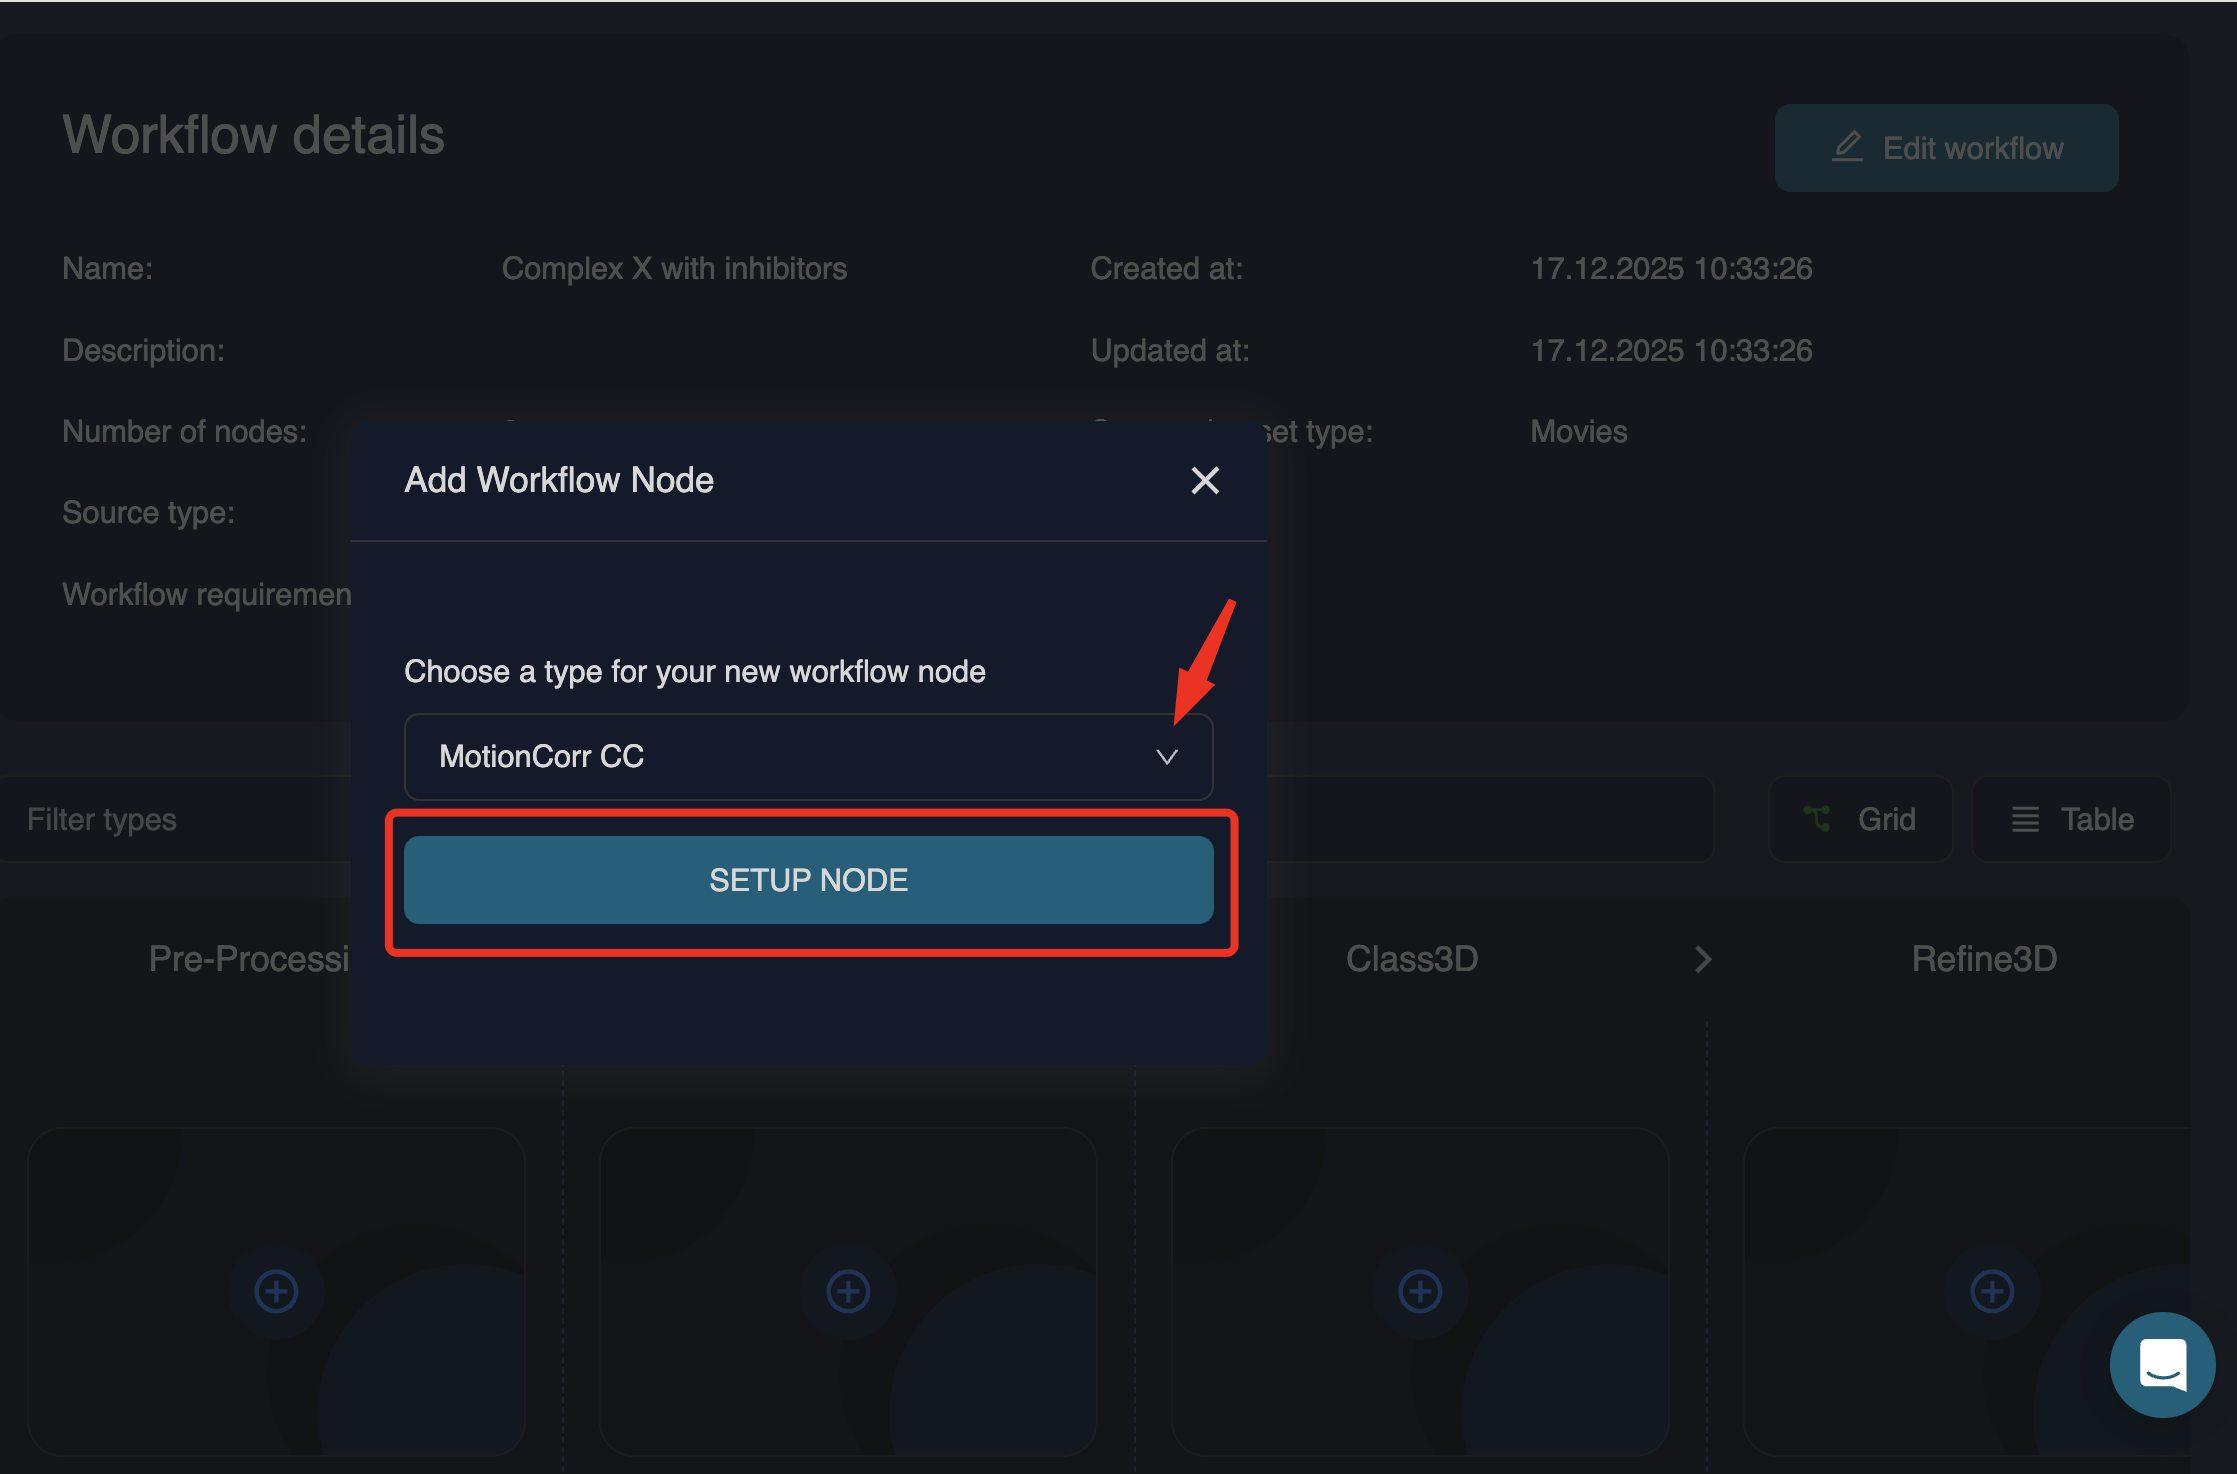
When a node is added, a pop-out window opens where you can review and edit job parameters:
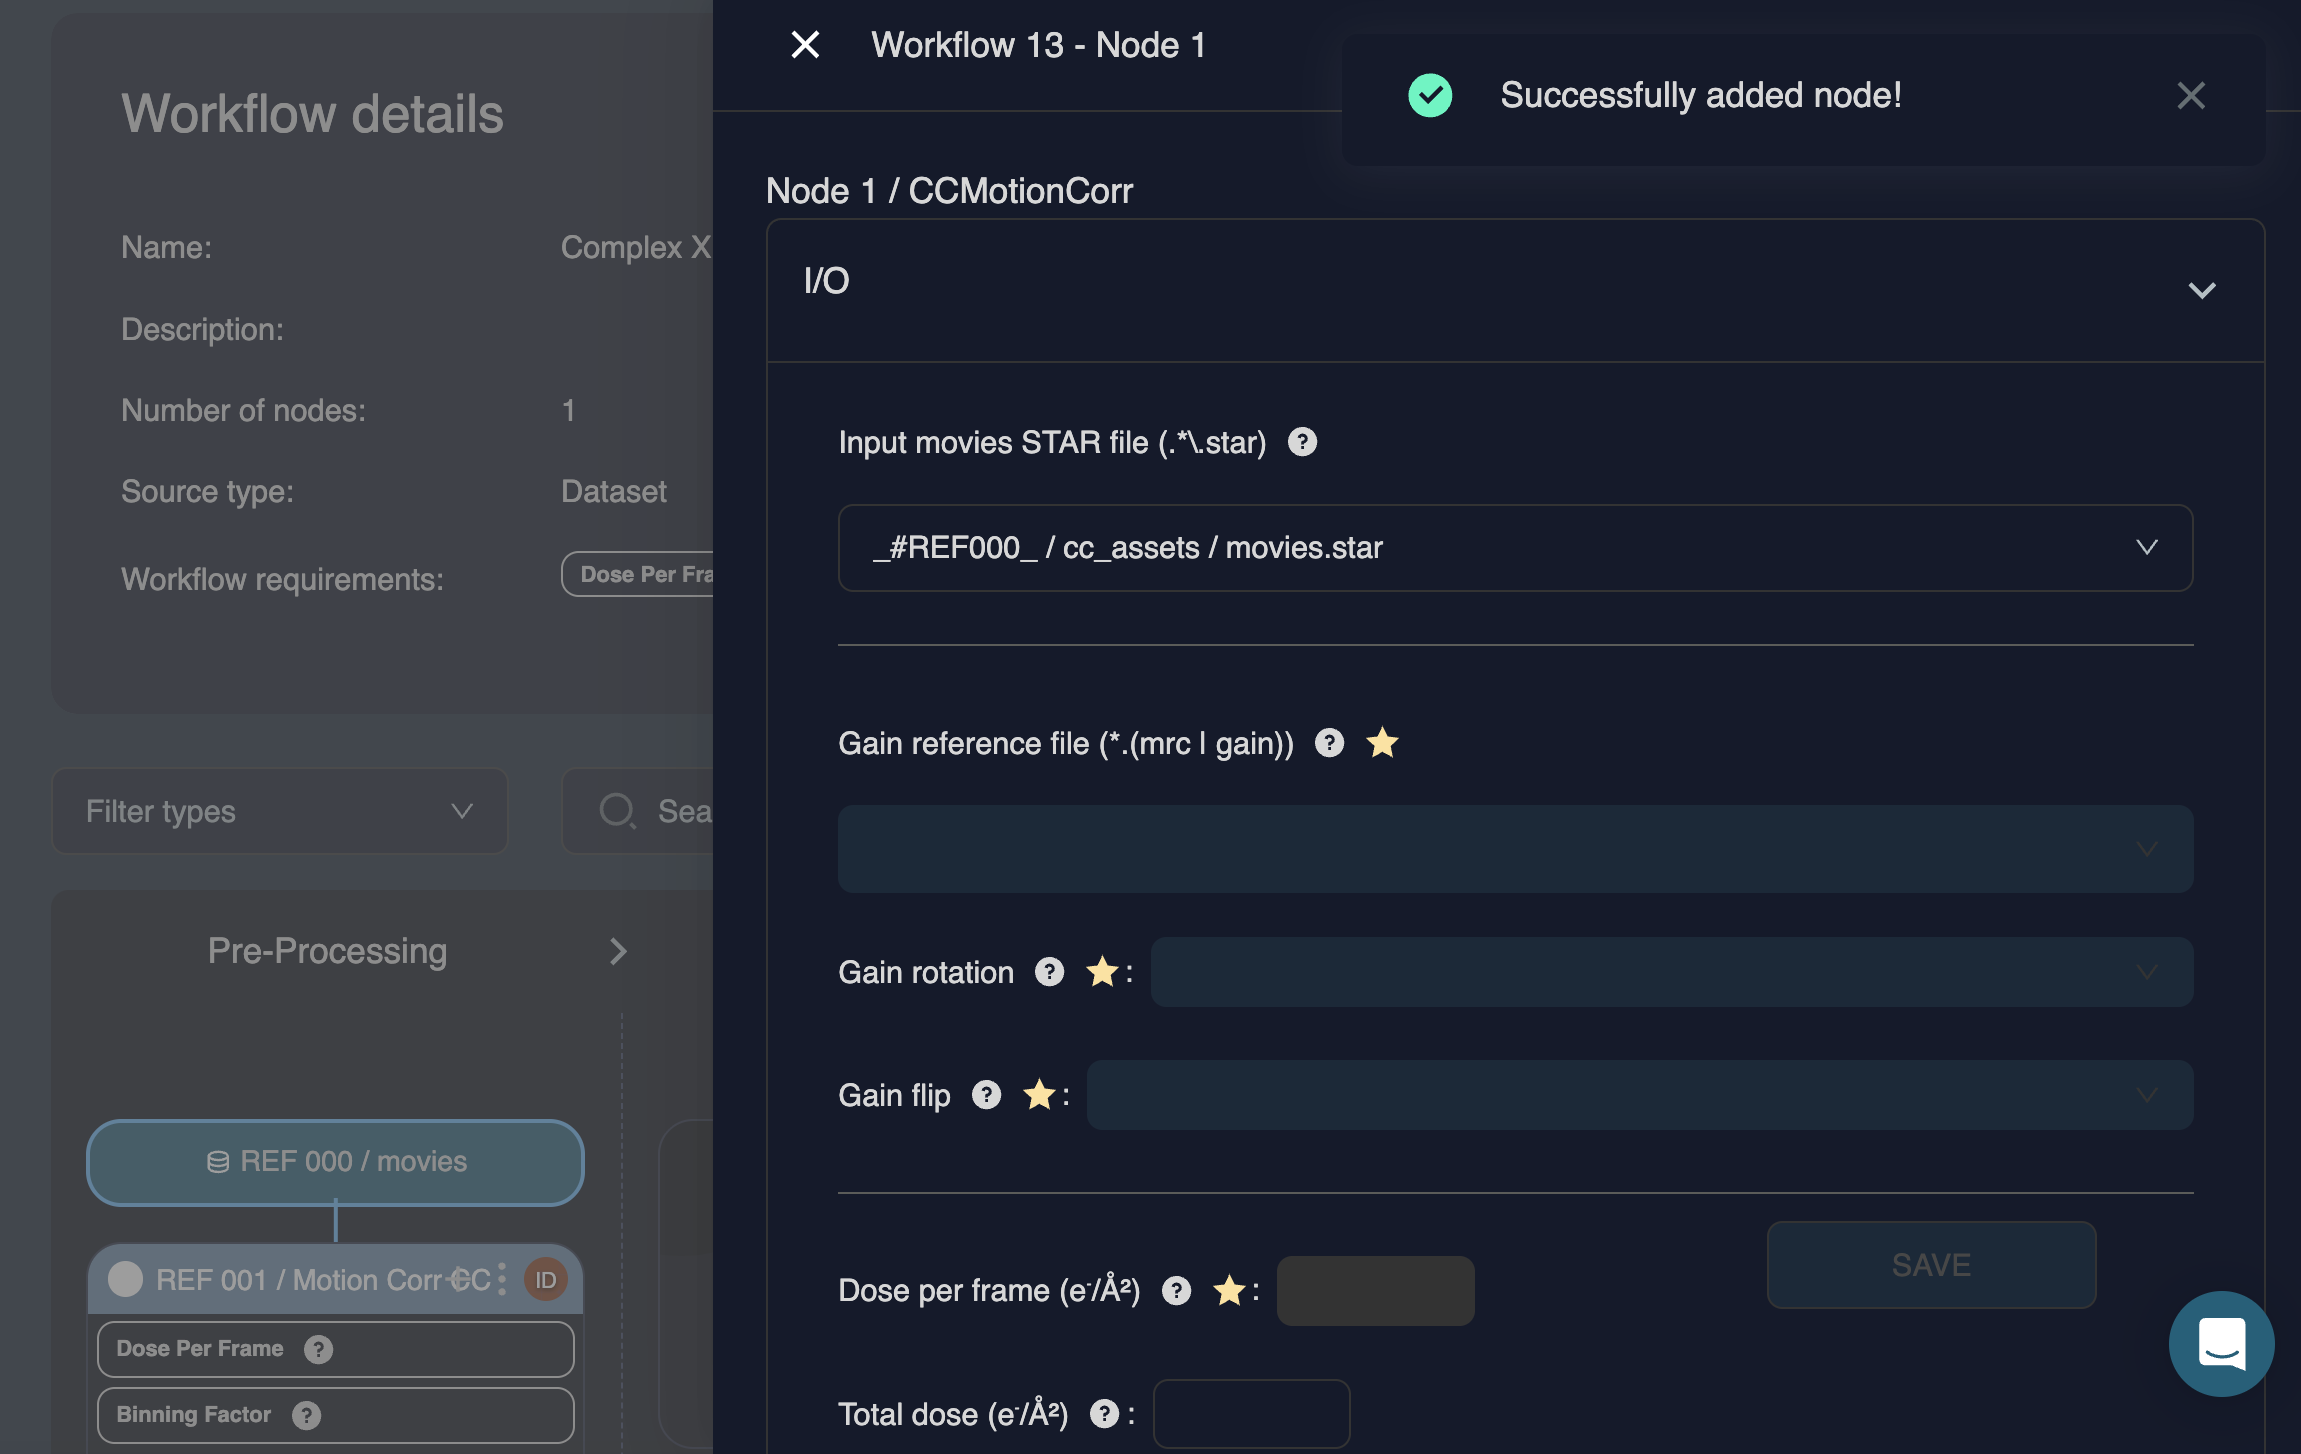
If no parameters are changed, you can close the window and continue.
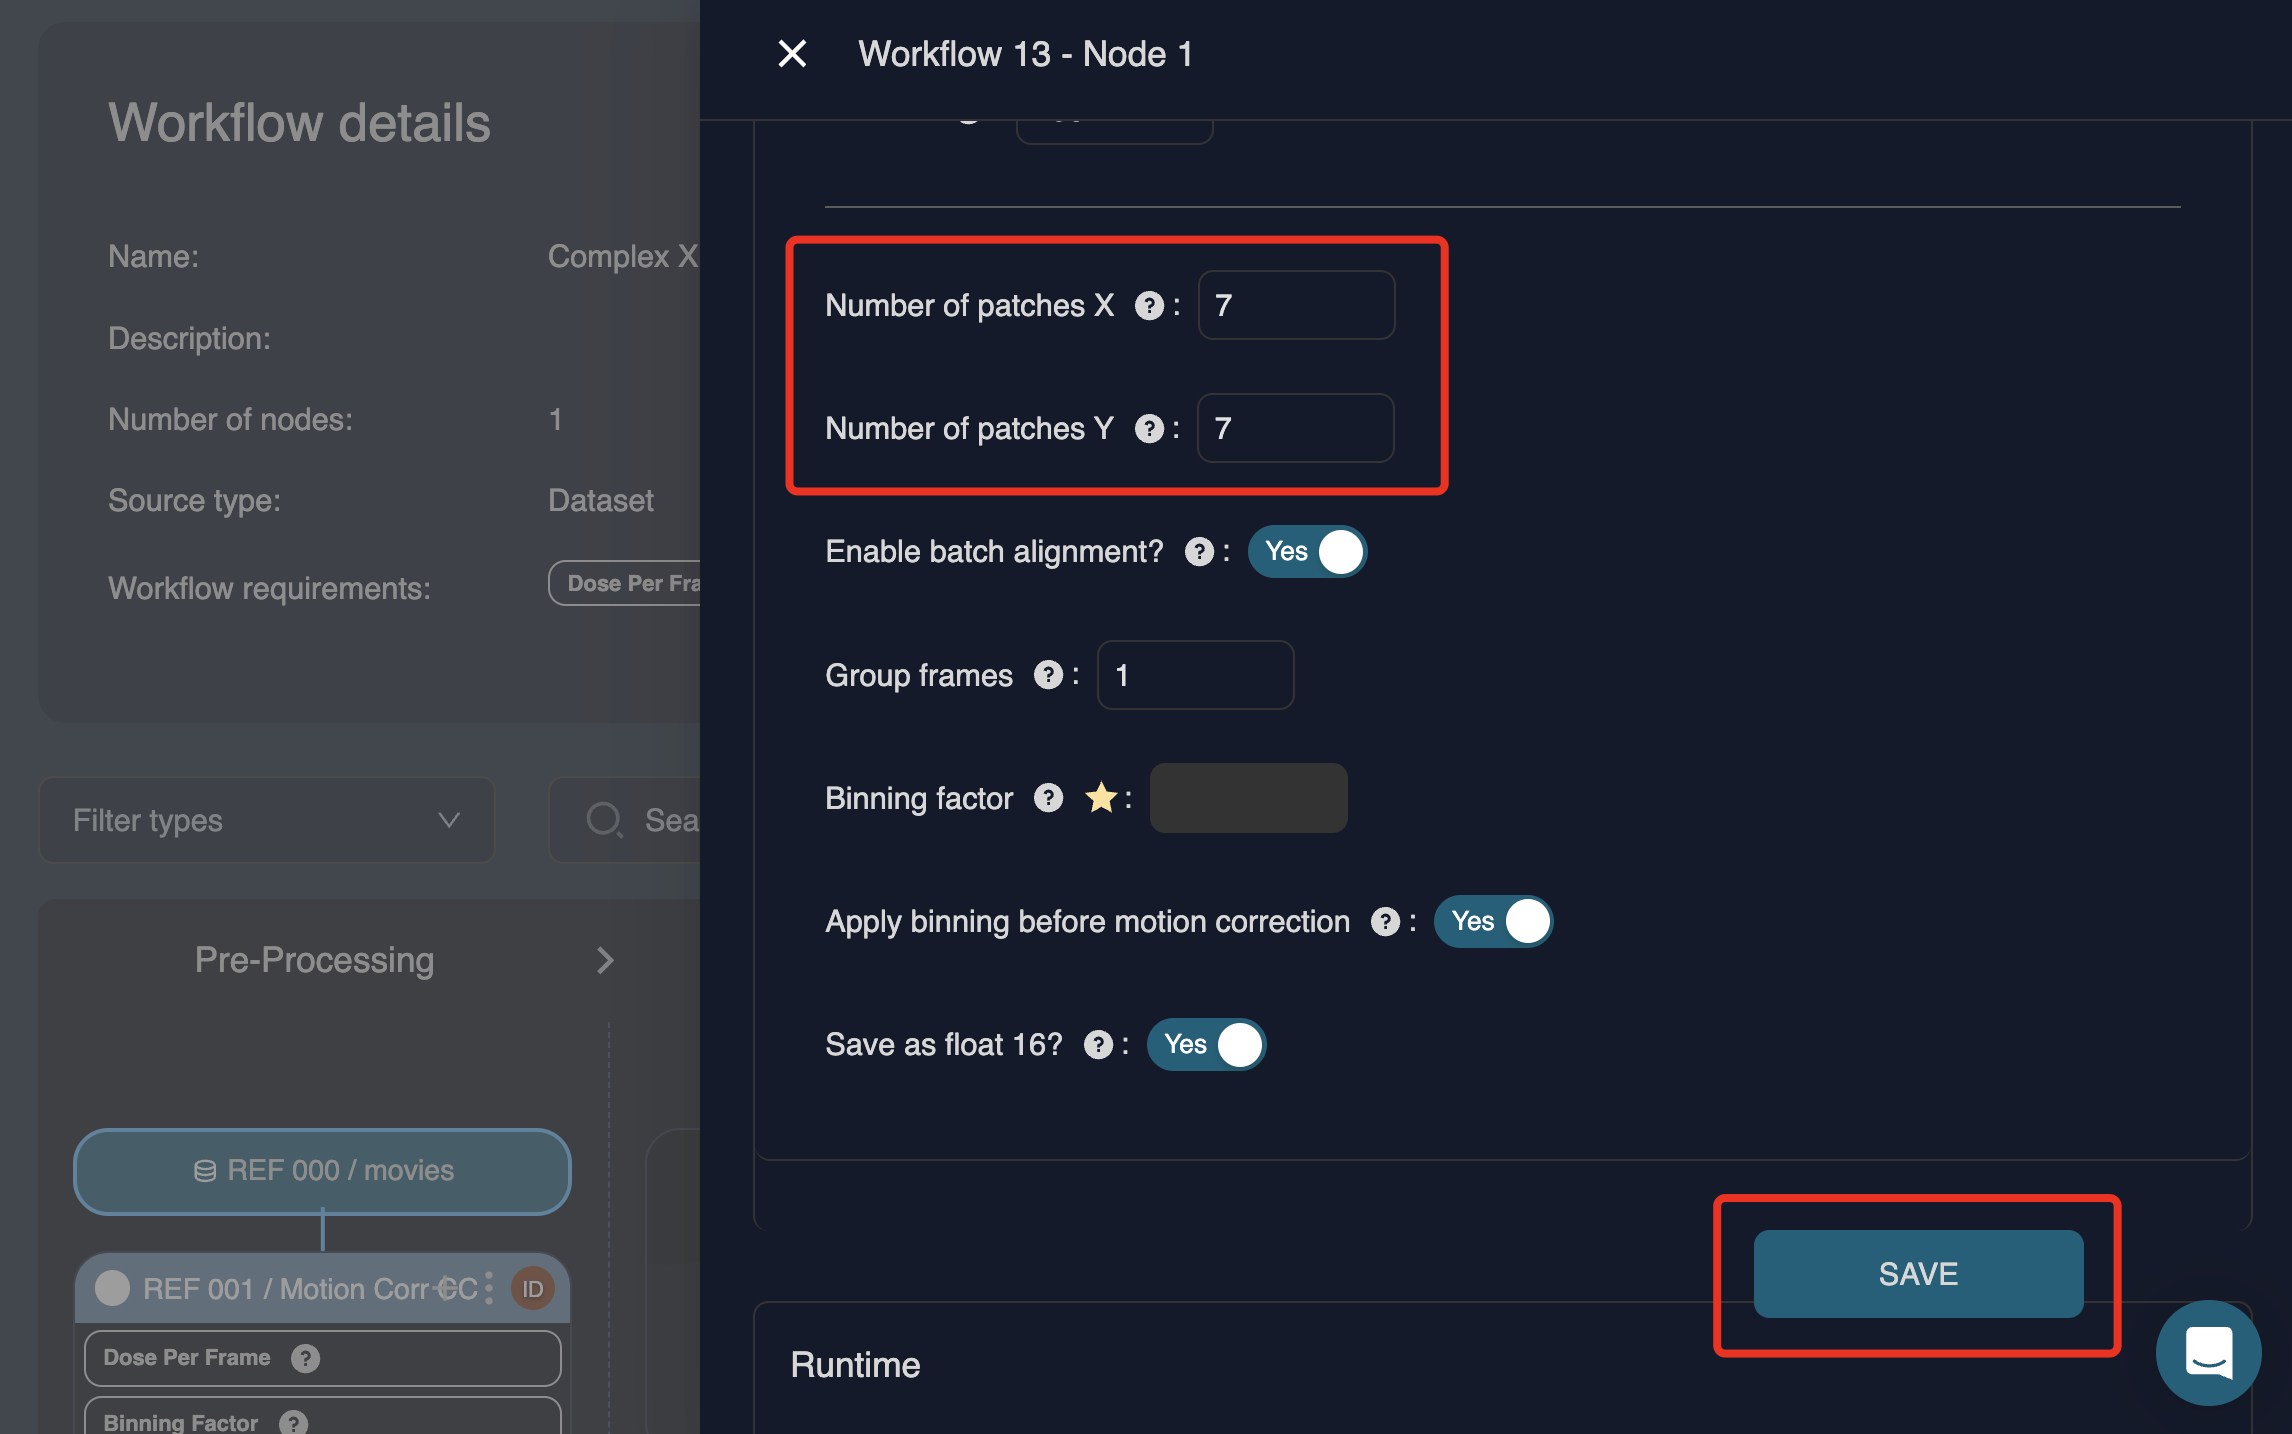
If parameters are modified, click at the bottom of the window to apply the changes. For example, if the number of patches is changed from 5×5 to 7×7, the button becomes active and must be clicked to store the updated parameters:
Workflows can include manual intervention steps, such as a user-driven select job. When a workflow contains one or more steps requiring user intervention, a warning is shown. The workflow will pause at each of these points and wait for user input.
Starred parameter fields
Fields marked with an asterisk (*) are automatically populated when a new project is started with a workflow. The values are calculated based on dataset metadata provided during the upload. For this reason, it is important to ensure that parameters such as particle diameter and symmetry are correctly set when uploading a dataset.
Adding subsequent nodes
To add another node, close the current node and click the icon below the last node:
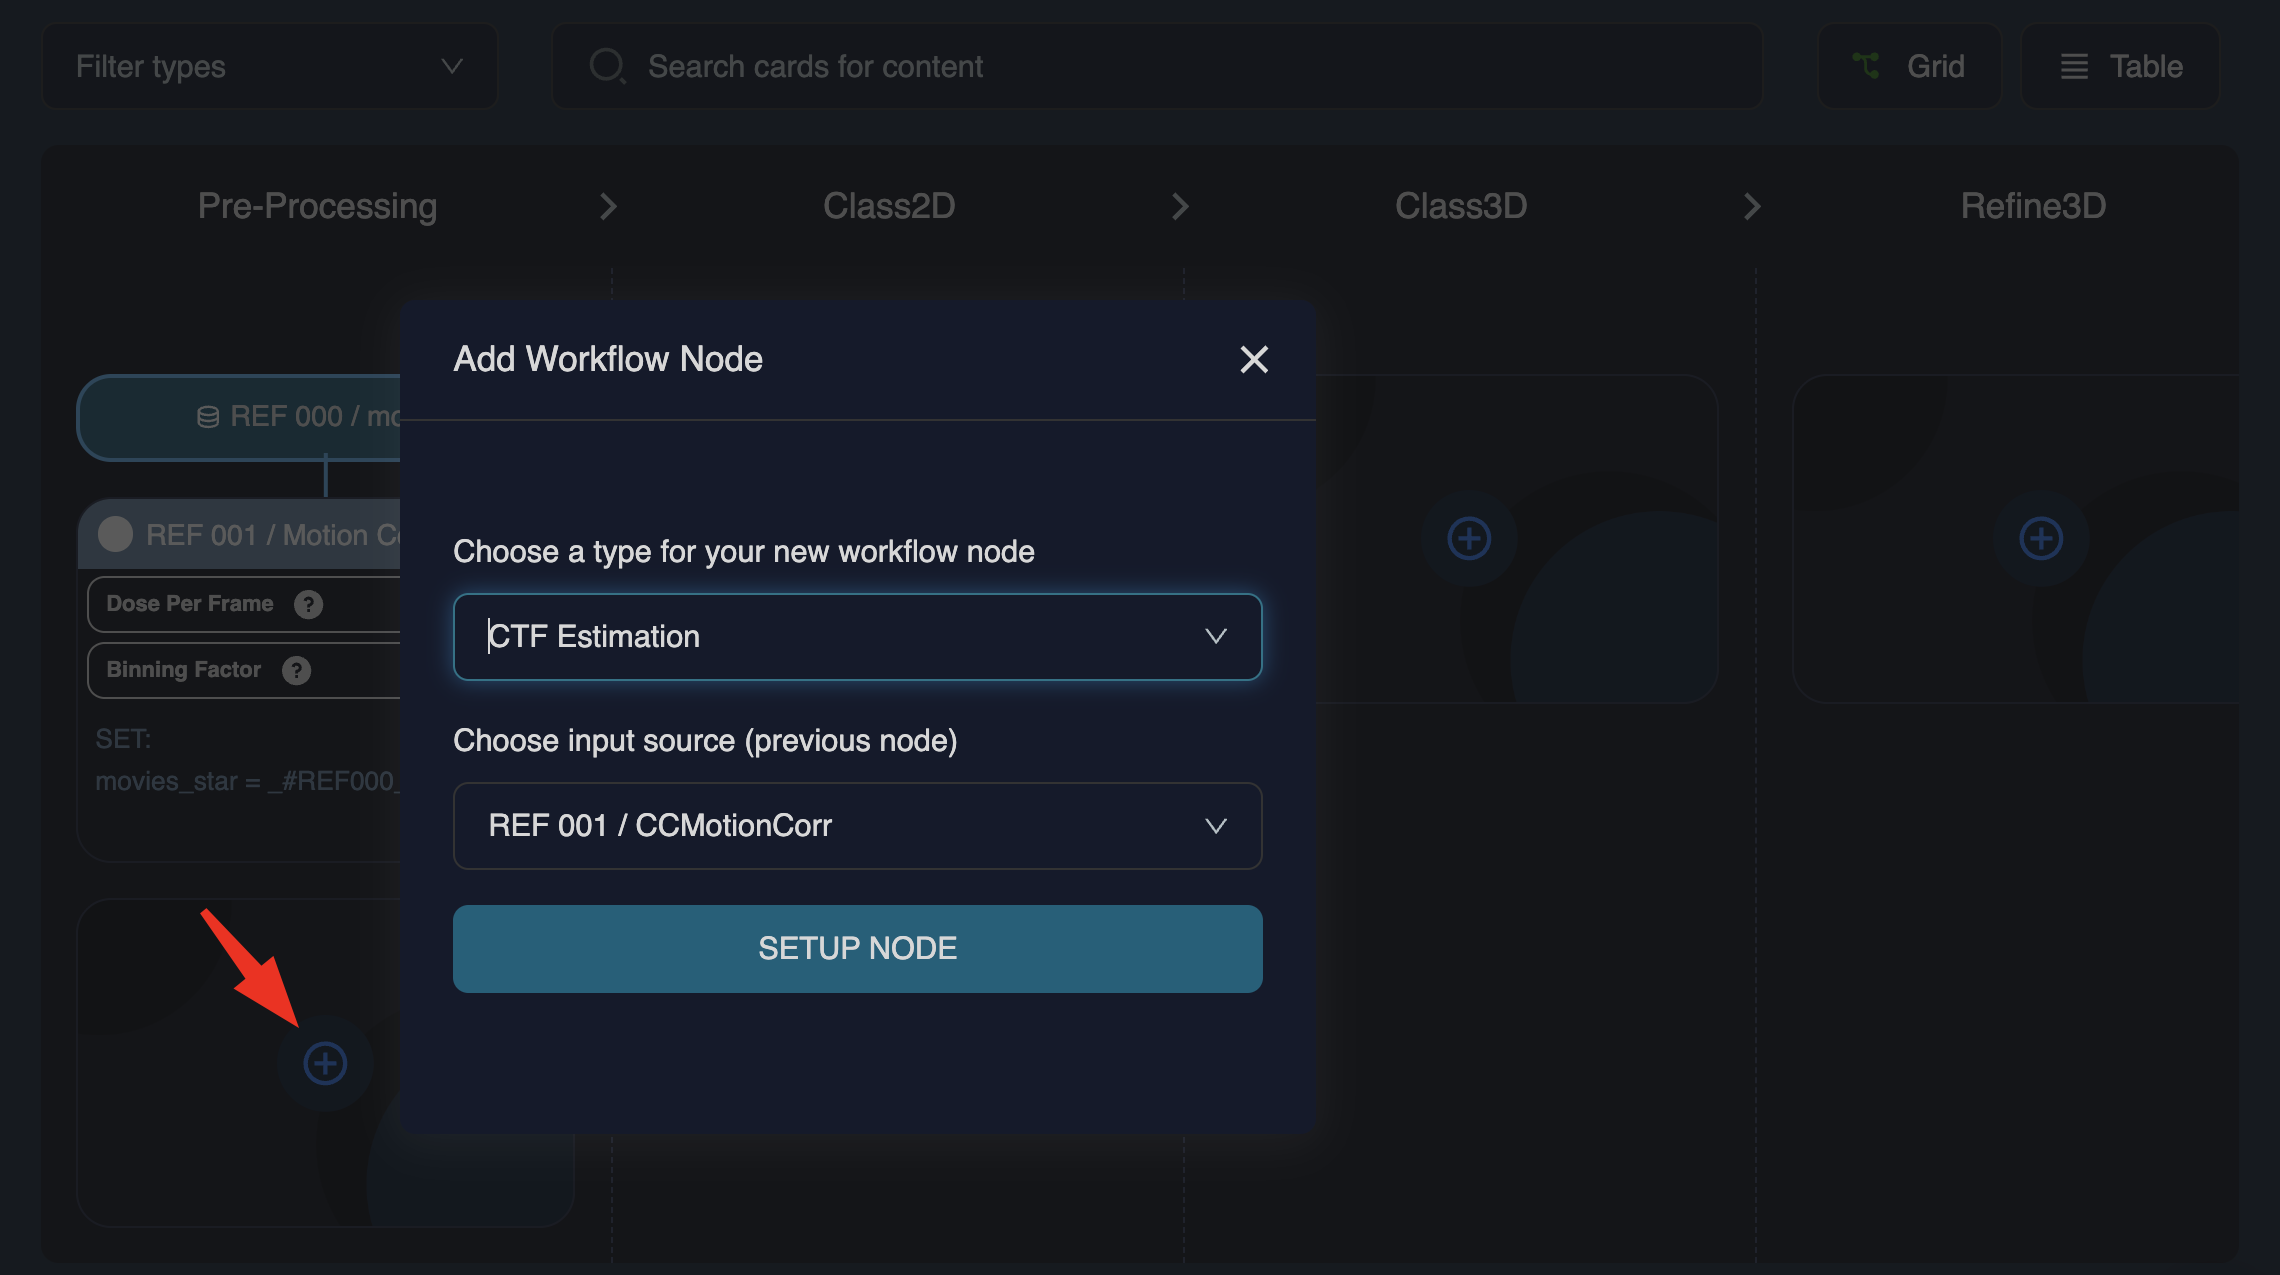
To set up the subsequent node, select the new node type (from the dropdown or by typing) and speify the input source (typically the output of the previous node). Continue this process until the workflow is complete.
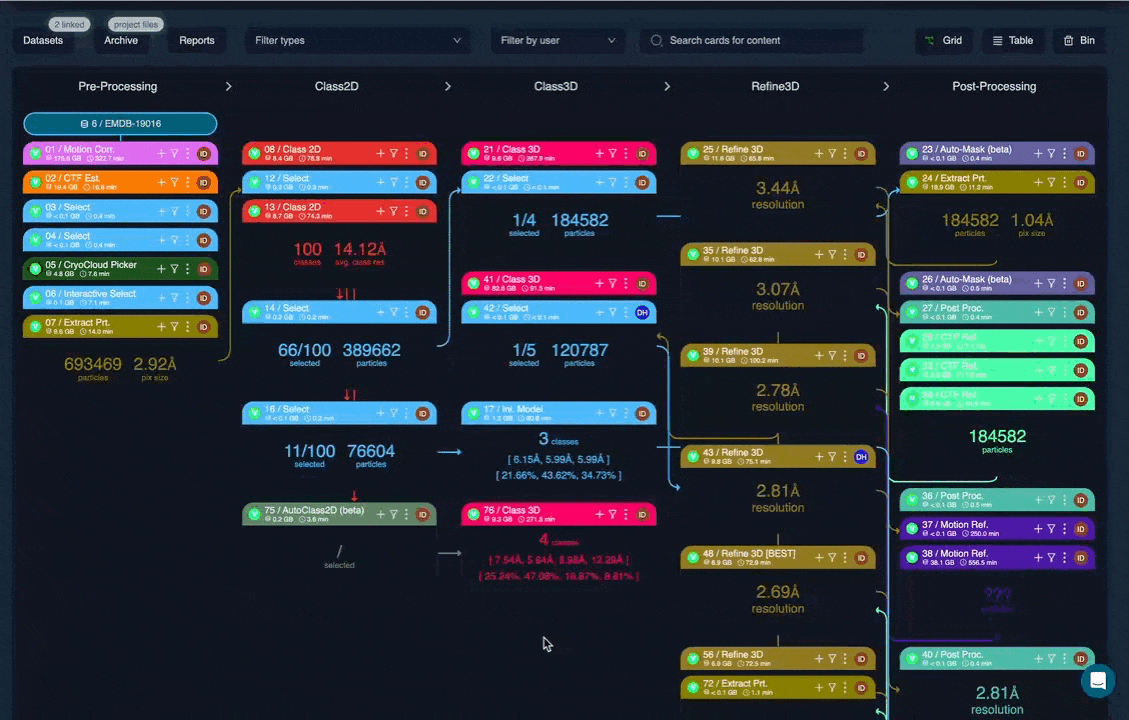
Once fully populated, the workflow may appear similar to this:
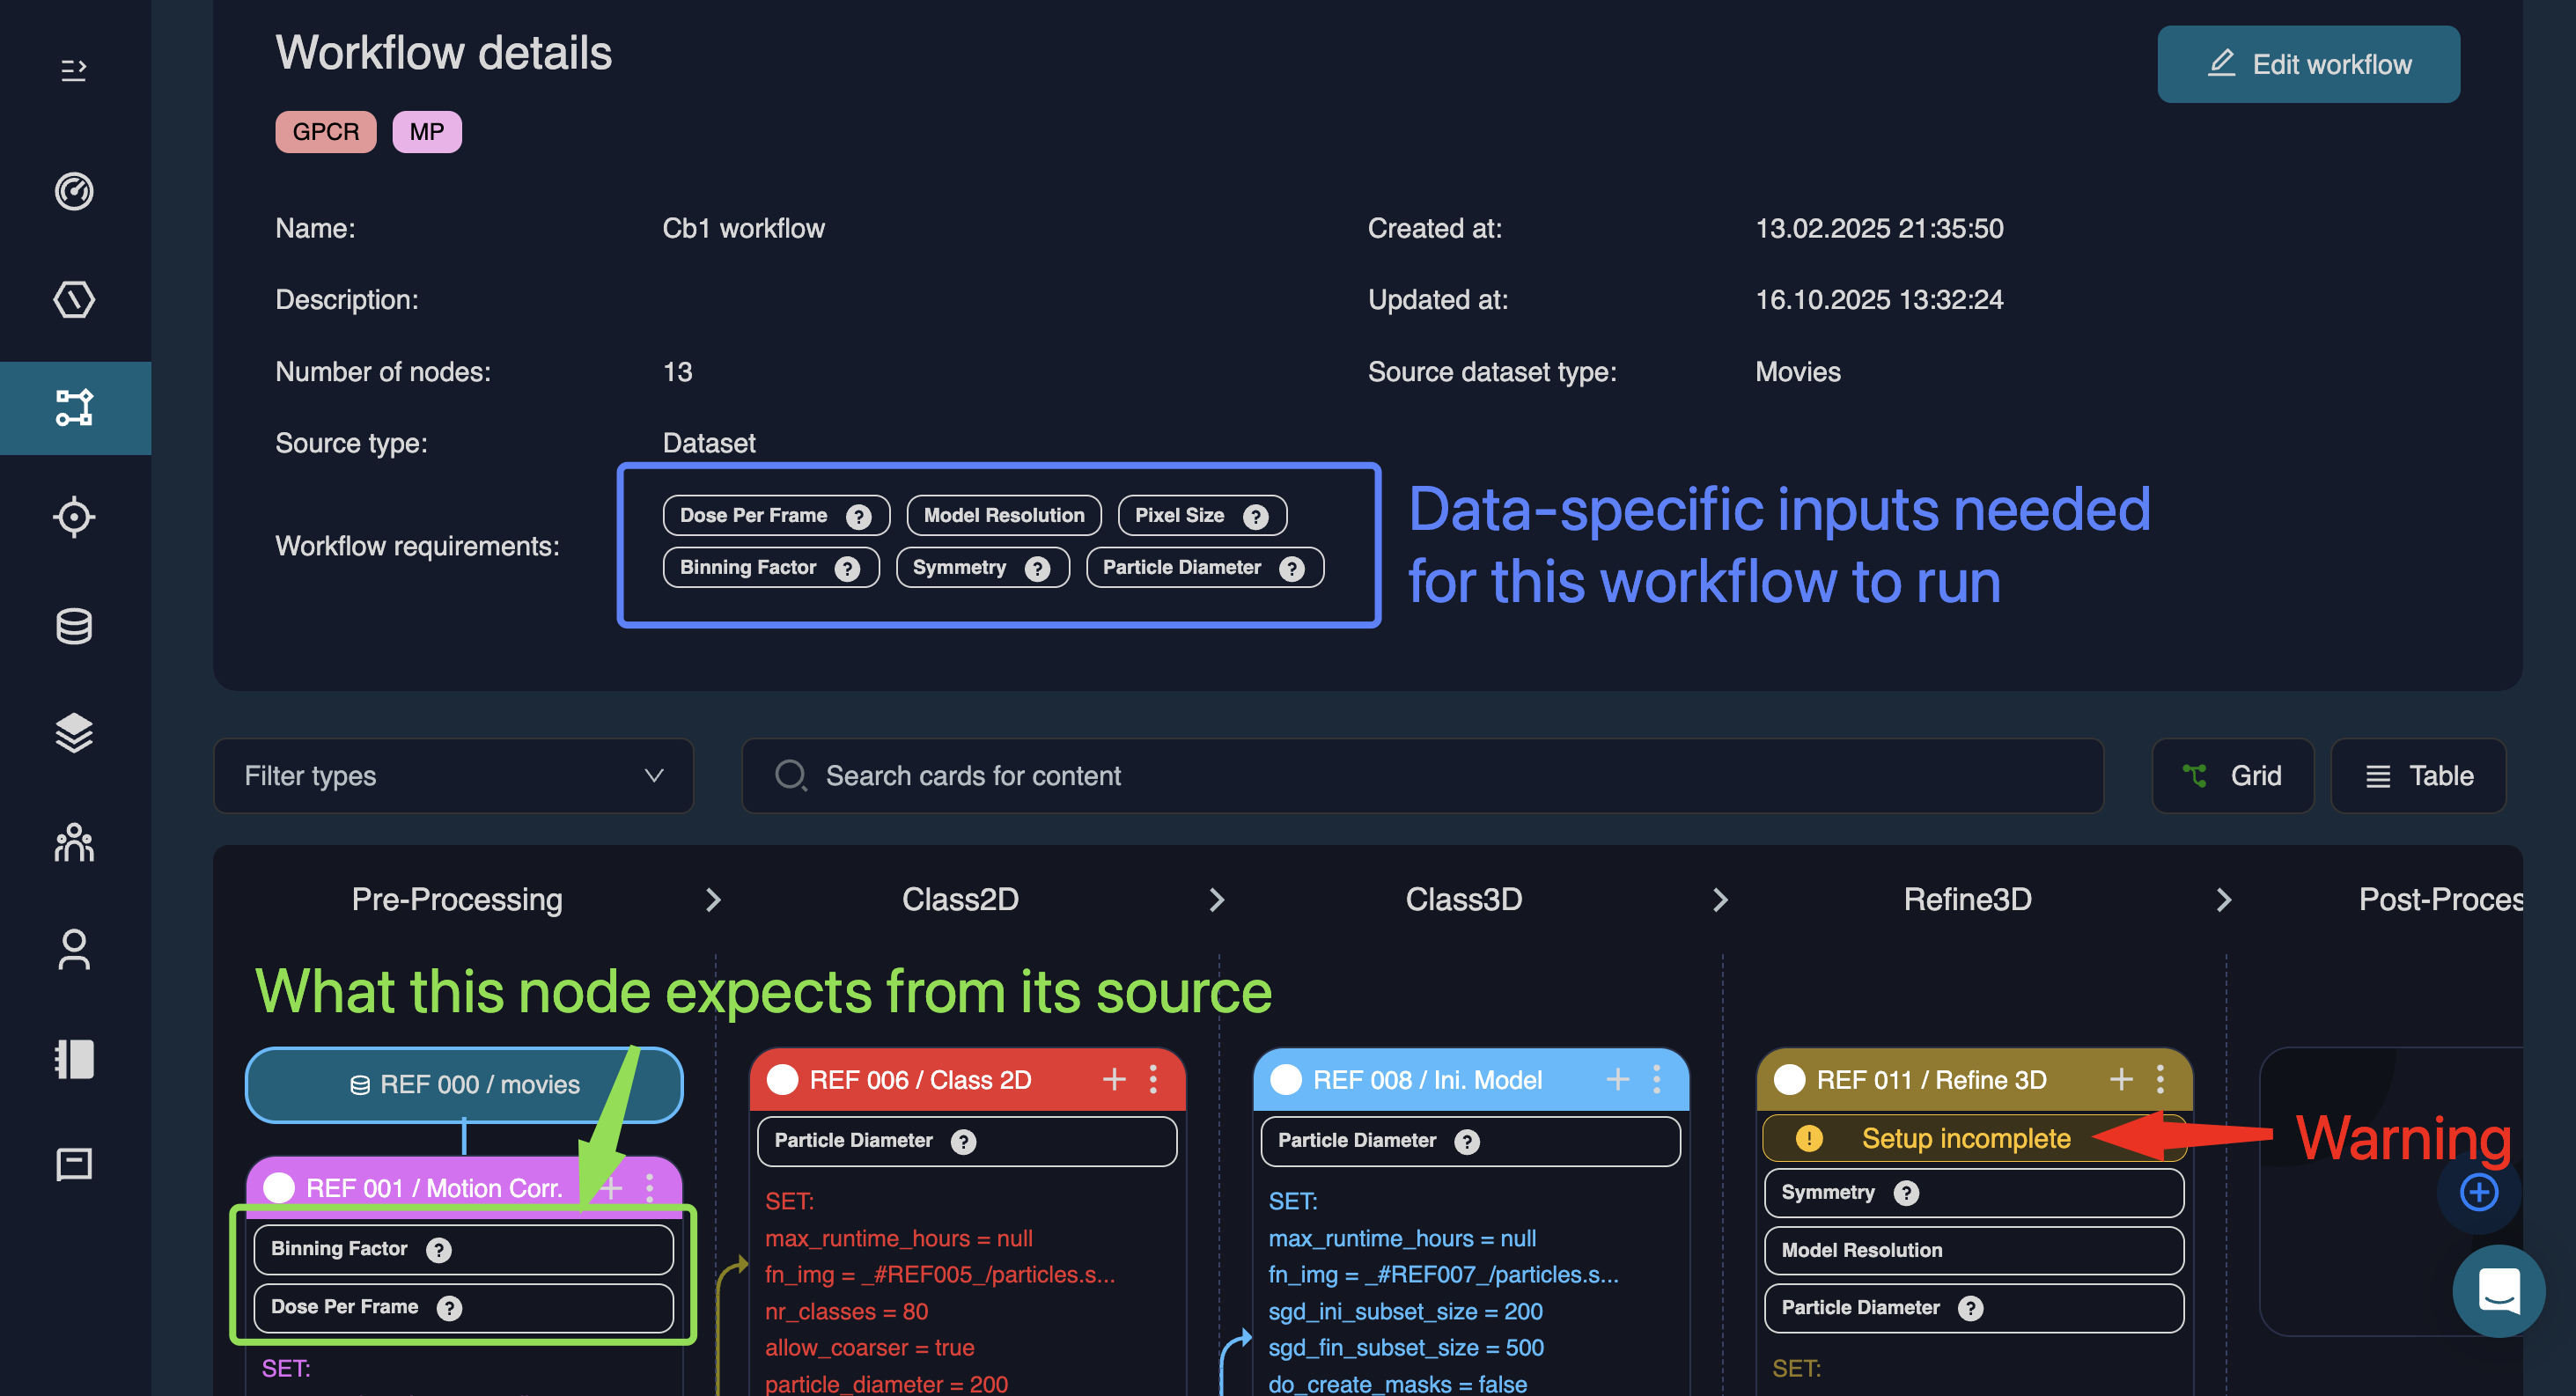
In each node tile, white boxes show what input this node expects. The workflow requirements field is workflow-wide and summarises all metadata required for this workflow to run. Any missing or incompatible information is flagged with a warning message within the tile “Setup incomplete”.
Workflow export & import
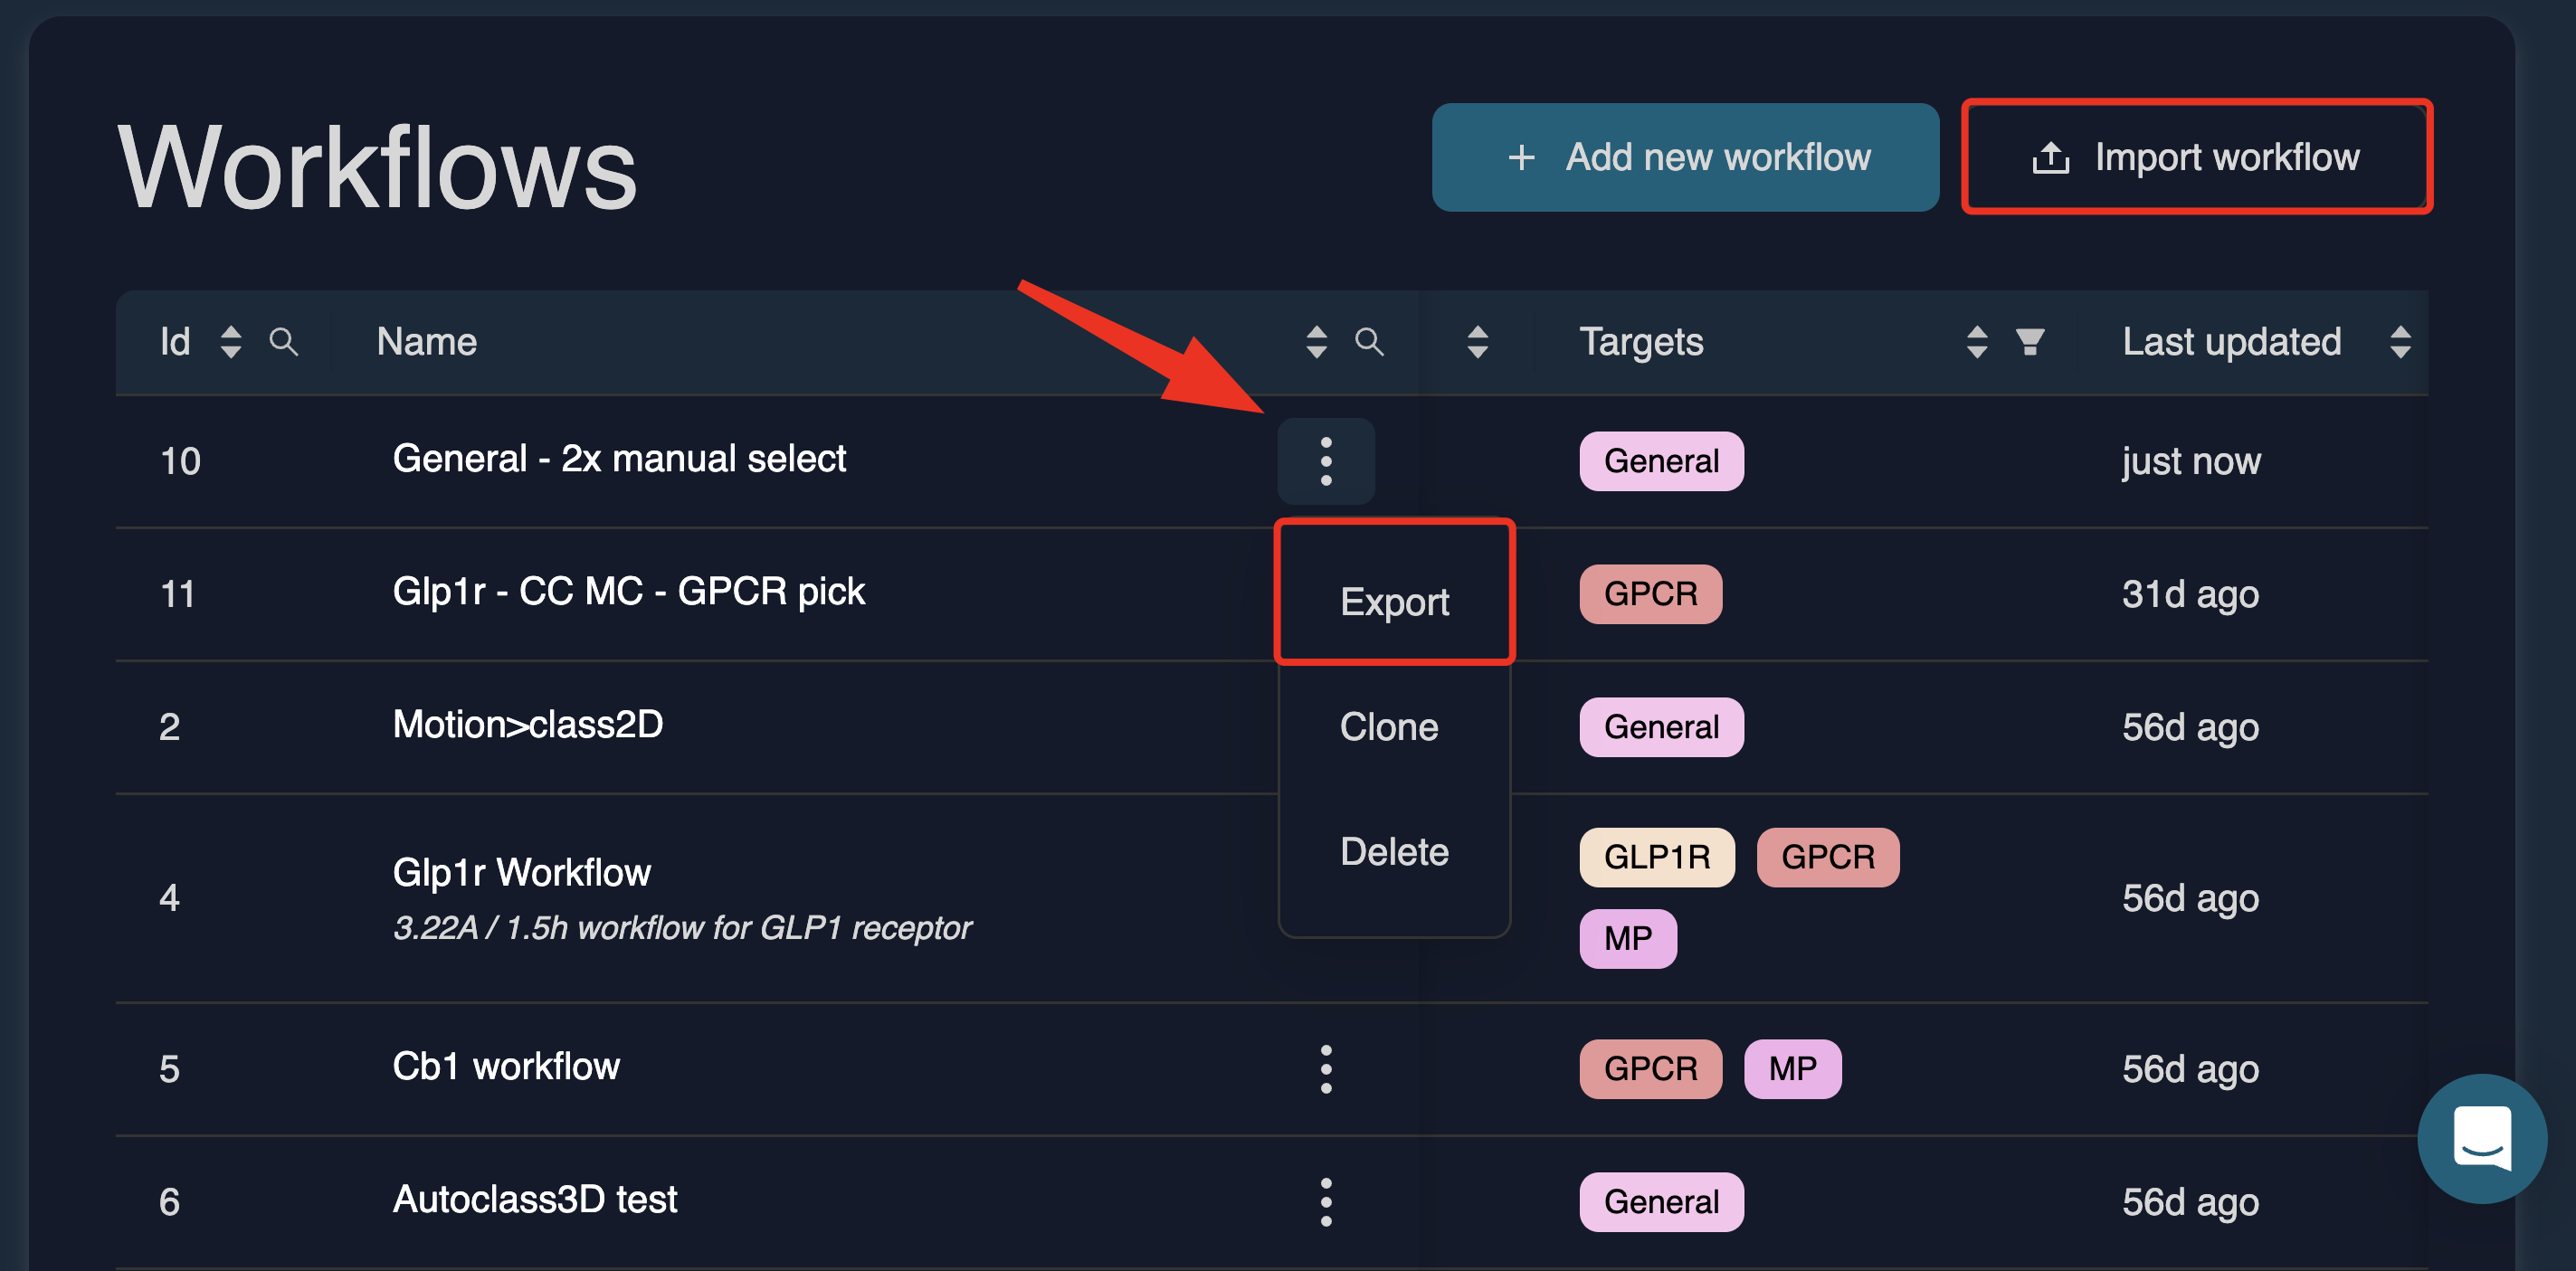
Export: Download a workflow as a JSON file via the Export action in the workflows table
Import: Upload a workflow JSON file directly from the dashboard
Applying a workflow to a new project
To apply a workflow to a new project, navigate to the Projects tab on the left hand side menu and click (top right). This will open a pop up window on the right:
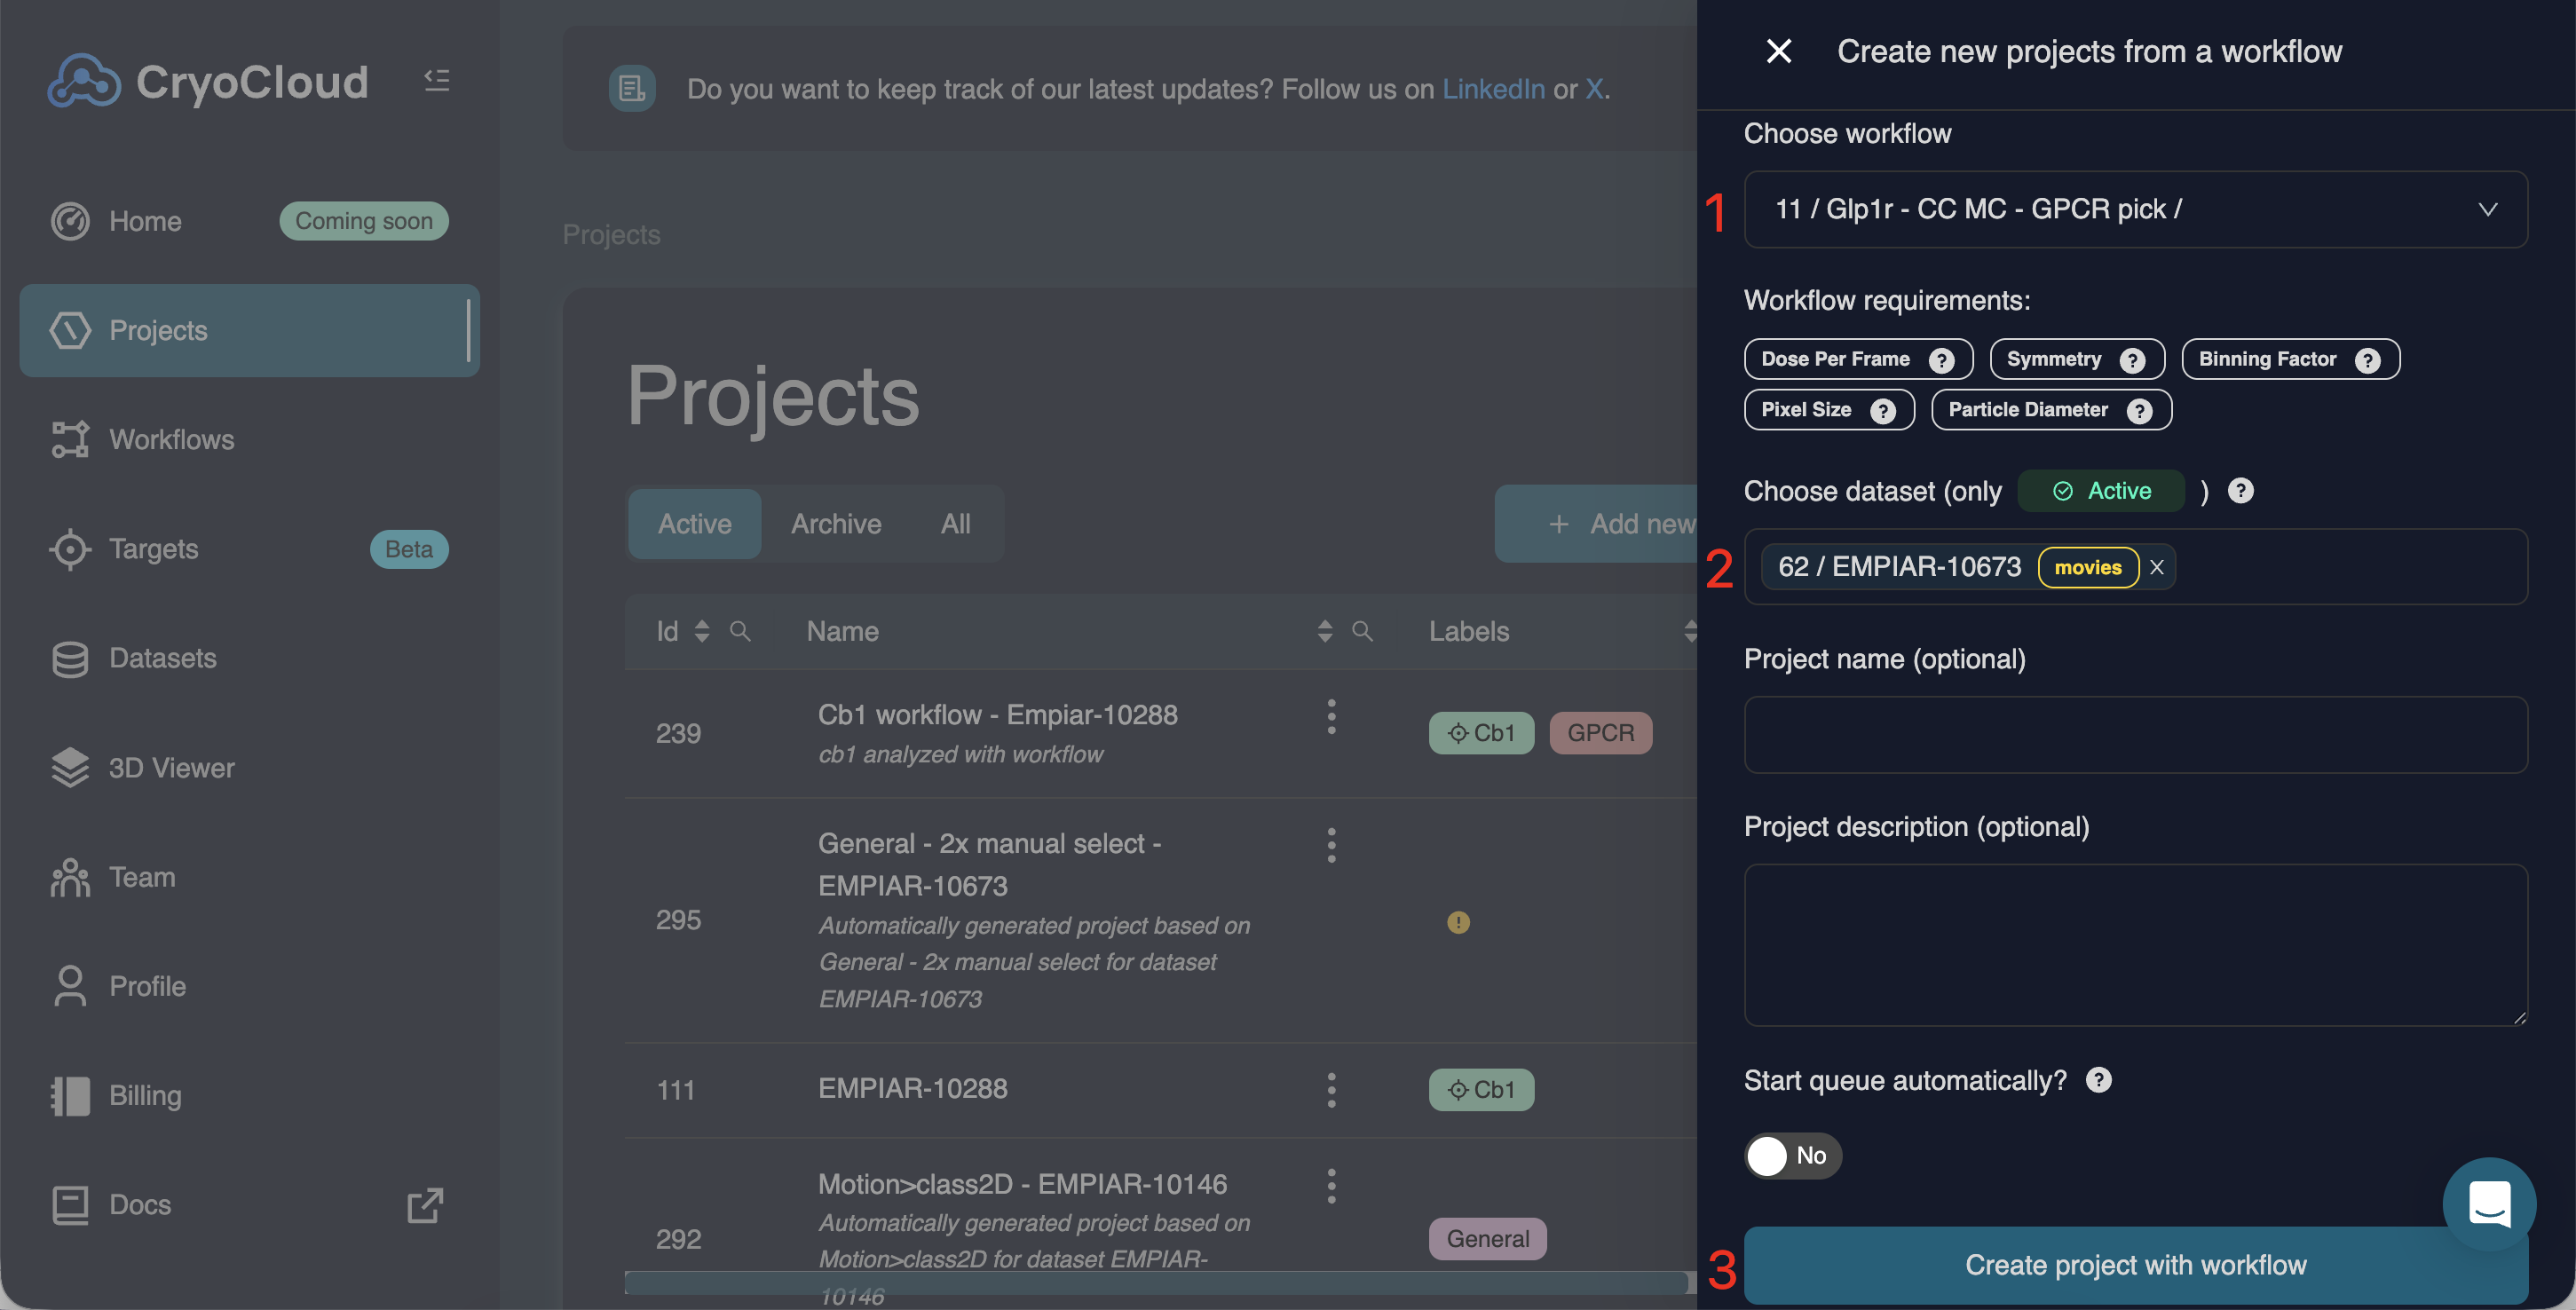
To finish the setup, select:
A workflow
One or more datasets (multiple datasets will create multiple projects using the same workflow)
Optionally: Set a project name and description, and enable automatic queue start
Click . A separate project will be created for each selected dataset.
If your workflow uses external references or masks, ensure the dataset has a Target label and that the corresponding target in the Targets page contains the required reference files.
Converting an existing project into a workflow
You can convert an existing sequence of jobs in a project into a reusable workflow.
From within a project, select a job and choose Convert to workflow. You can then select which downstream jobs (child jobs) should be included. Each selected job is converted into a workflow node in the same order as the original project.
During conversion, CryoCloud automatically analyses the workflow and lists any workflow requirements that cannot be resolved internally. These requirements will be populated later when the workflow is applied to a new project, based on available datasets, targets, or external resources.
Implementing a workflow within a pre-existing project
Workflows can be added to a project in the same way you would add a new job. The job selection window now has a ‘Workflow tab’, allowing you to append a premade workflow to any compatible job in your project.
For example, a workflow containing a cycle of CTF refinement, refinement and post-processing can be appended to a Post-process job in your project. This avoids tedious one-by-one job addition and prevents mistakes in input and parameter setup.
Automatic input wiring and field strategies
Workflow nodes now support automatic input wiring, allowing fields to be populated automatically when a workflow is applied.
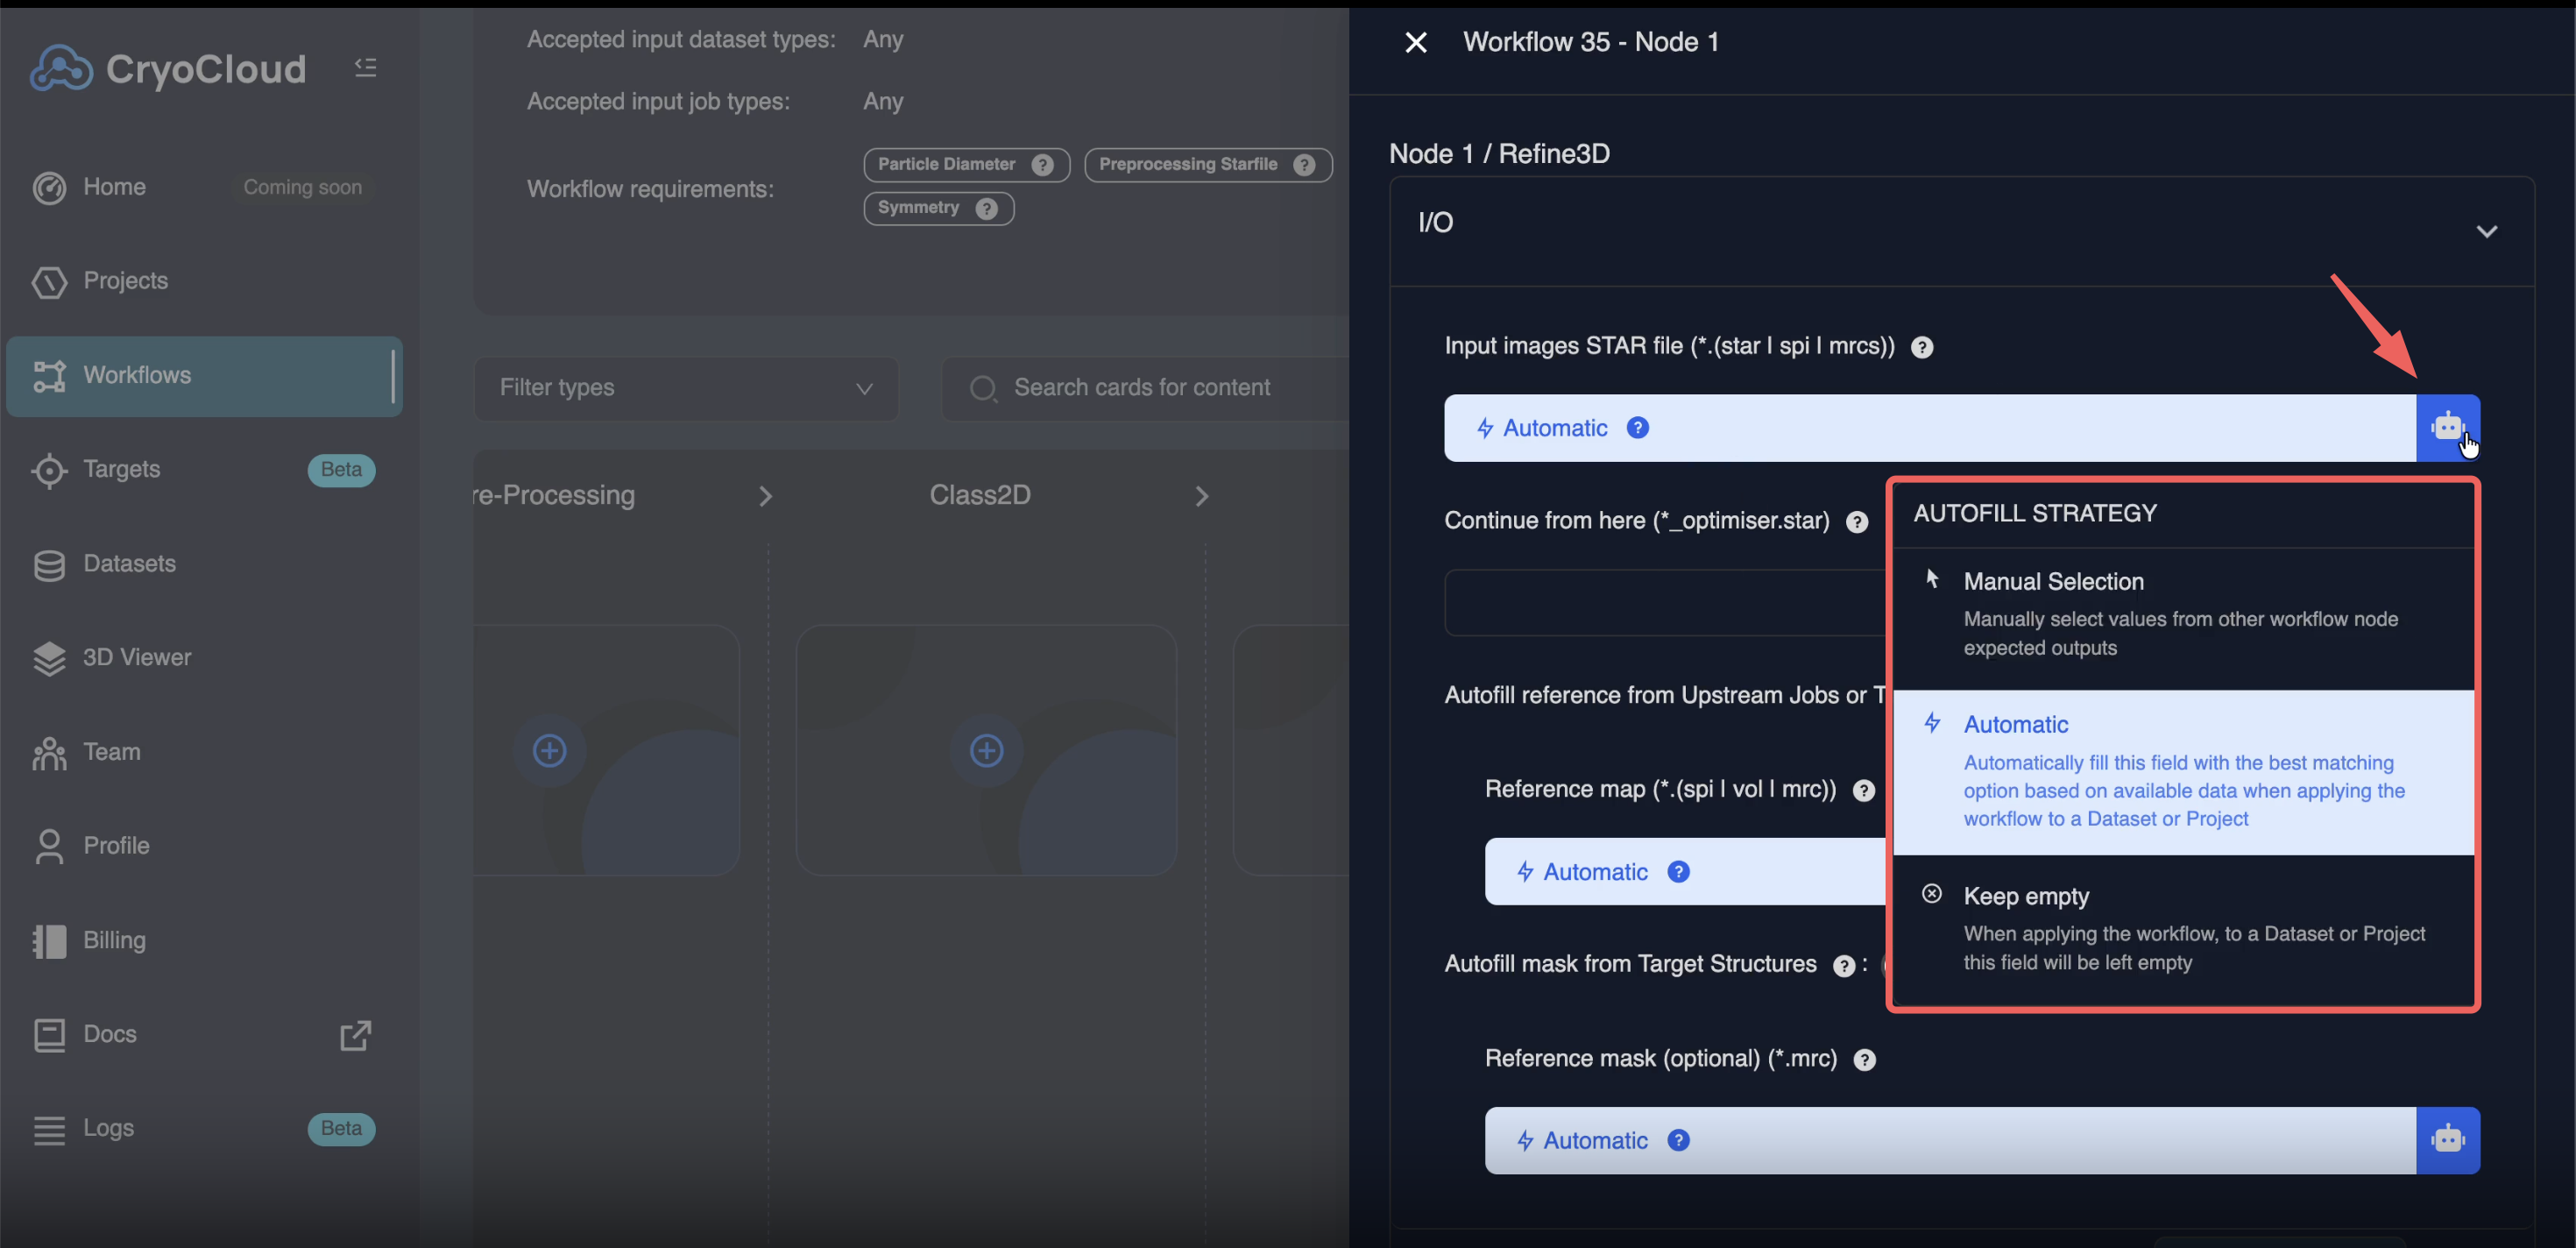
For each configurable field, you can choose one of the following strategies:
• Automatic – CryoCloud automatically selects the most appropriate upstream resource
• Manual – The user must explicitly select the input when applying the workflow
• Keep empty – The field is left unresolved and must be filled later (where supported)
If a field was populated in the original project during workflow creation, a placeholder value is stored and the field will be re-requested when the workflow is applied to a new project.
Applying compatible and recommended workflows
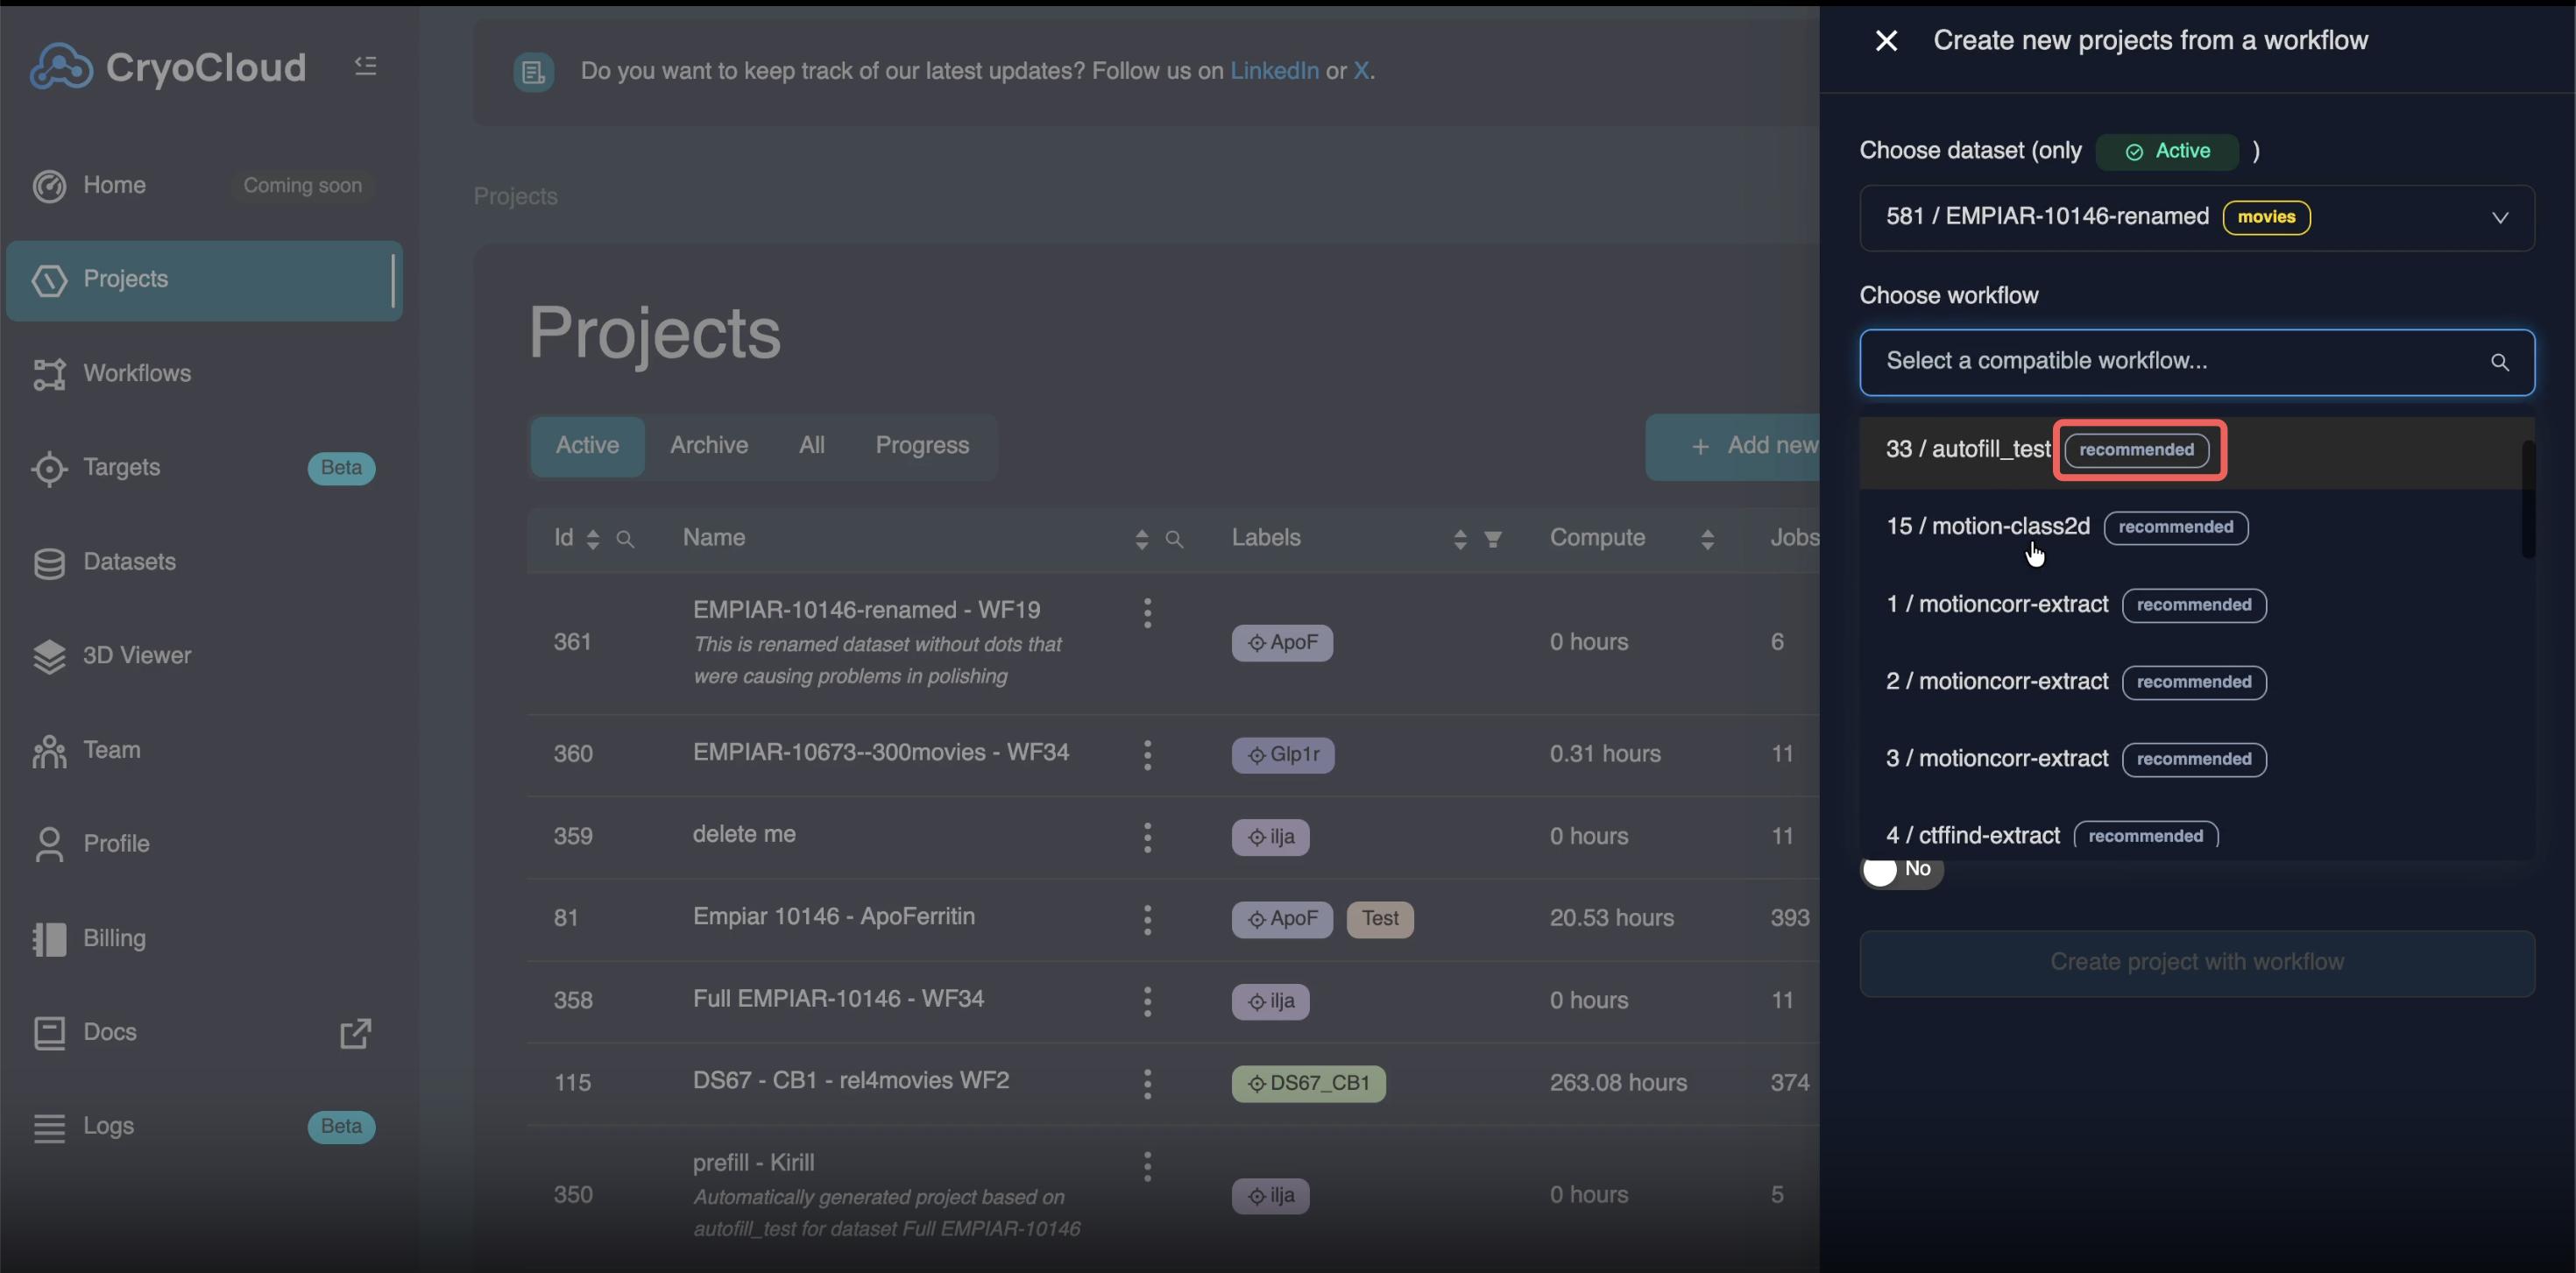
When starting a new project from a workflow, CryoCloud now distinguishes between:
• Compatible workflows – Workflows that can technically be applied to the selected dataset
• Recommended workflows – Workflows that are explicitly marked as appropriate for the dataset type or entry point
When you select a dataset while creating a new project, CryoCloud automatically suggests recommended workflows based on dataset type and expected first job (for example, motion correction for movie datasets).
Existing workflows remain fully supported and behave exactly as before.
Defining workflow compatibility
You can define which dataset types or job types a workflow is compatible with by editing accepted inputs within the workflow editor.
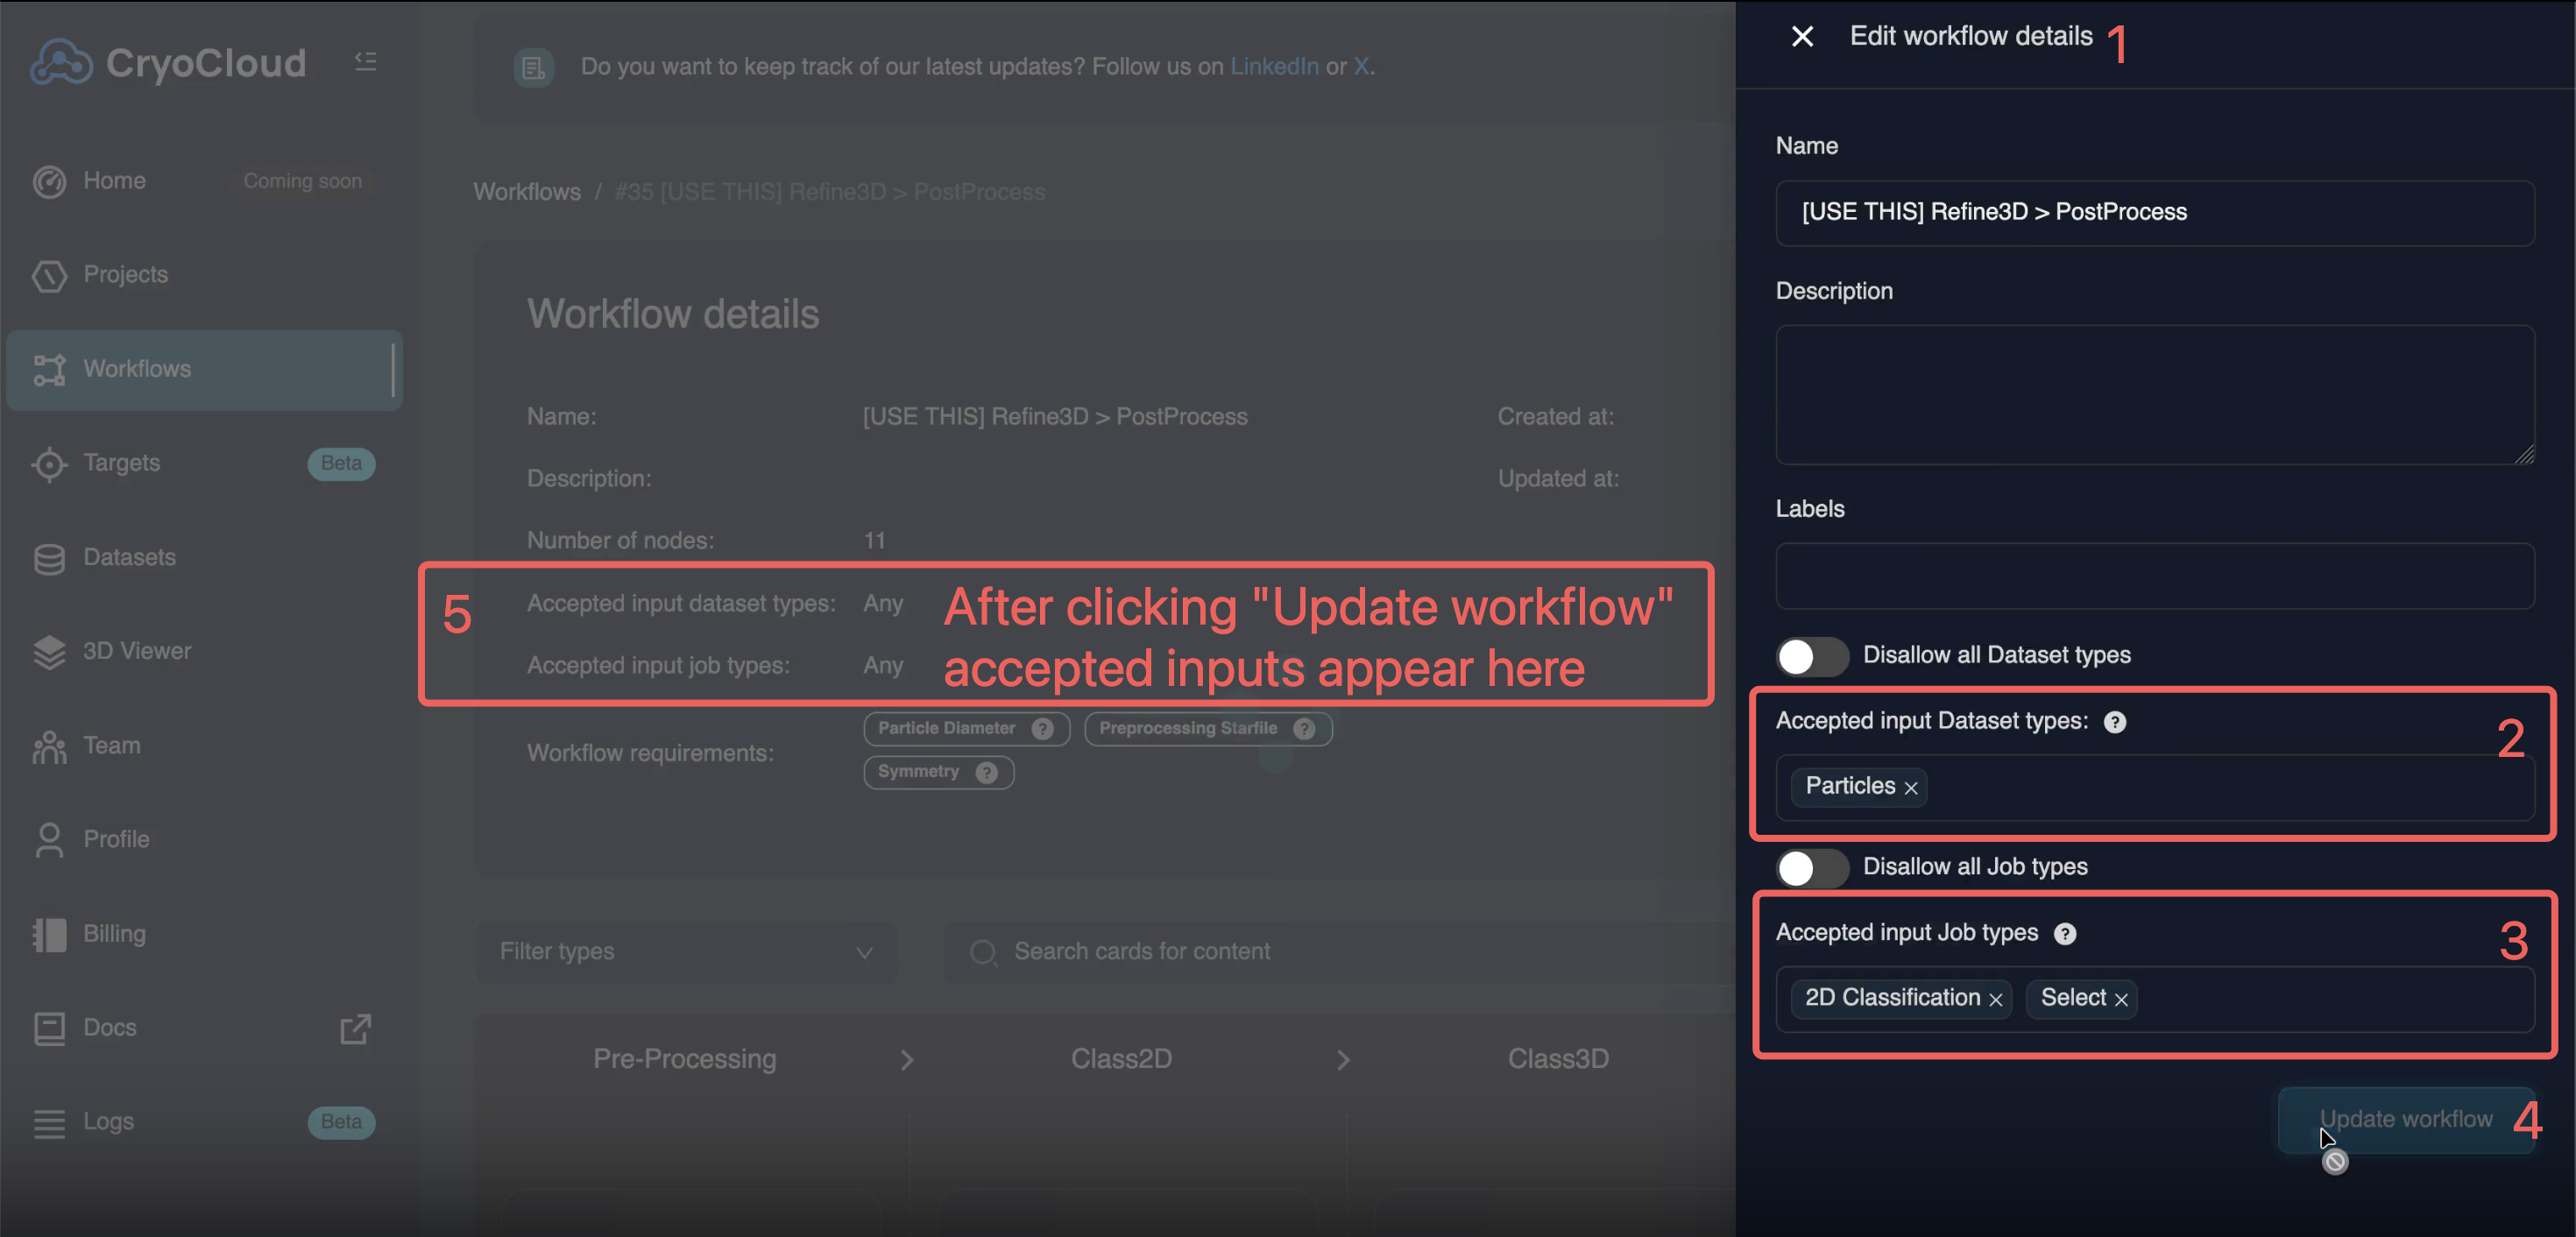
These compatibility settings determine:
• When a workflow is suggested as recommended
• Where the workflow appears as an option when adding jobs or starting new projects
Compatibility is currently configured using separate dataset and job-type selectors. These settings control how and where the workflow is surfaced to users.